Quick Start
The shortest path for new MoleAPI users from signup to their first successful API call
Welcome to MoleAPI.
If you only have one goal right now—get your API call working as quickly as possible—then this document is for you. You do not need to read all the documentation first. Just follow the 3 steps below, and in most cases you can complete your first working integration.
Step 1: Create your API Key
Before using MoleAPI, you need to create an API Key first (also called a Token).
Its purpose is simple:
- Identify who is making the request
- Control which models you can access
- Record logs and attribute costs
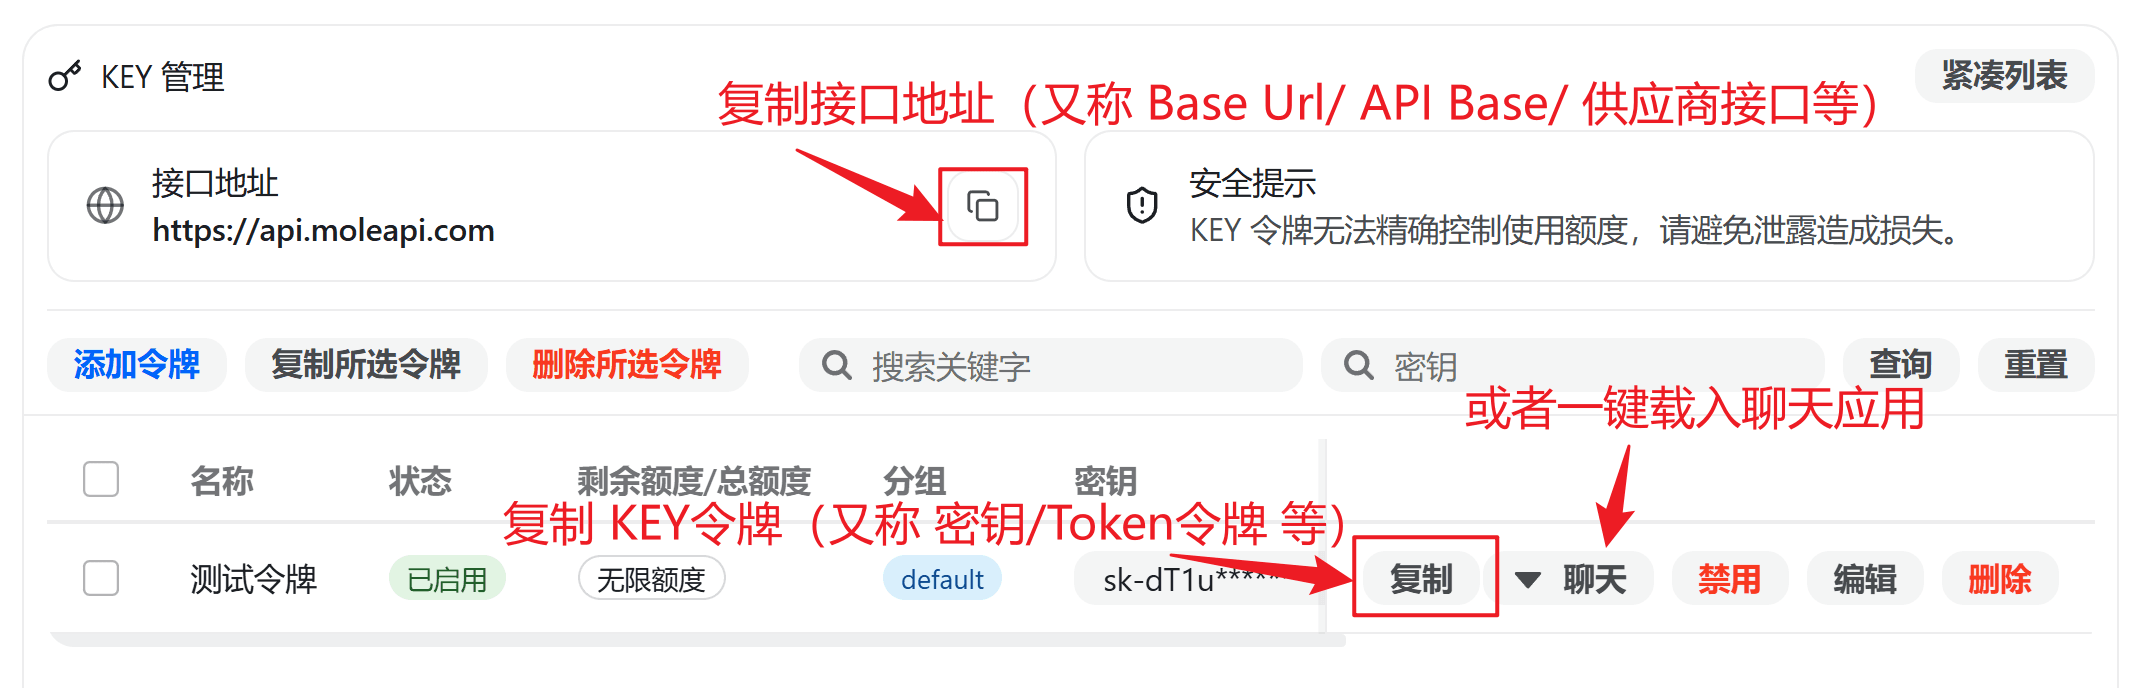
You can create it in the console:
- Entry URL: https://home.moleapi.com/console/token
- Page path:
Console → KEY Management
The actual UI of the creation page looks like this:
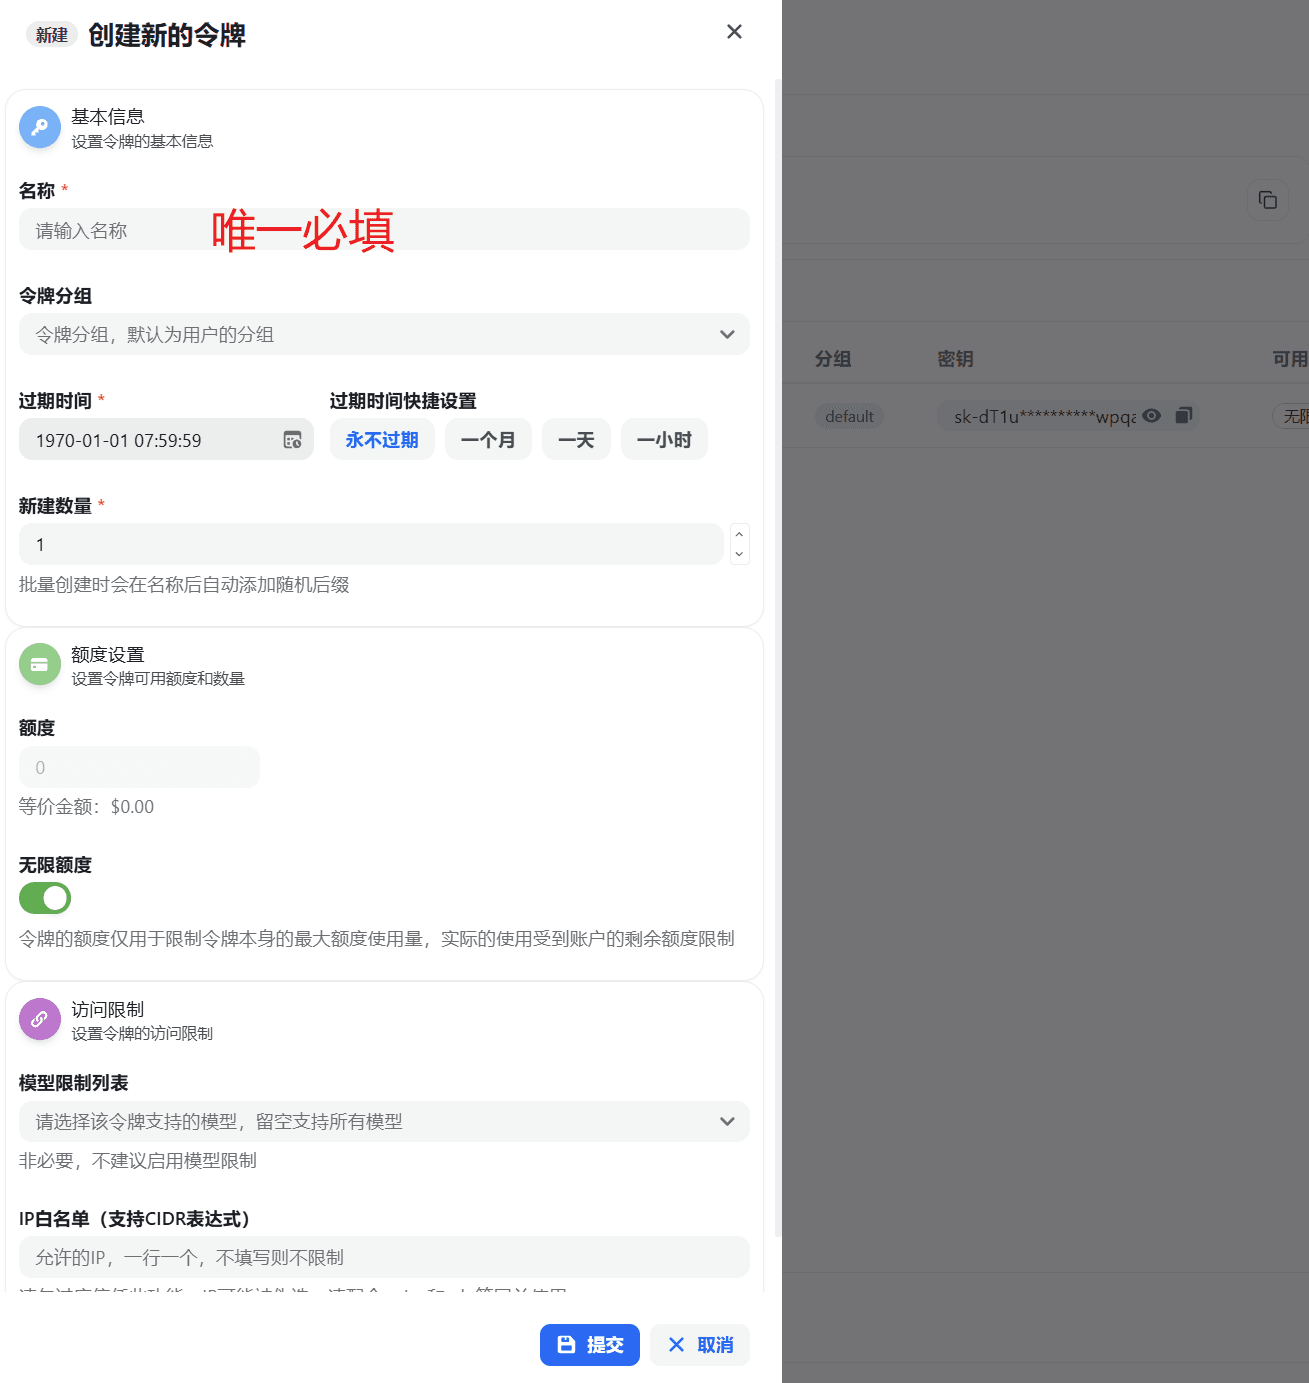
If this is just your first test, we recommend filling it out like this:
- Name:
dev-local - Group: default group
- Expiration time: one month
- Quantity: 1
- Model restrictions: leave unrestricted for now
- IP whitelist: leave blank for now
Recommendation for first-time use
Create a dedicated Key for testing first. Do not mix production and test environments from the beginning.
If you want a field-by-field explanation of this screen, continue here:
Step 2: Prepare the two core integration parameters
Most clients, SDKs, or self-built projects that support OpenAI-compatible APIs only need the following two core parameters to get started:
The two most important parameters
- Base URL:
https://api.moleapi.com/v1 - API Key: the
sk-...you just created in the console
You can think of them like this:
- Base URL determines where the request is sent
- API Key determines who you are, whether you have permission, and where the cost is attributed
Why the Base URL usually needs to end with /v1
Because many tools automatically append API paths after the address you provide, such as:
/chat/completions/responses/embeddings
So if you are not sure what to enter, use this first:
https://api.moleapi.com/v1If you want a deeper explanation, see:
Step 3: Paste them into your AI app or code
Once you have:
Base URLAPI Key
You can now paste them into any tool that supports OpenAI-compatible APIs, for example:
- Chatbox
- NextChat
- Cherry Studio
- Immersive Translate
- Your own OpenAI SDK code
In most cases, if these two values are correct, you can already start making requests normally.
In AI apps, you usually also need to select a model before you can use it. Please note:
- Models can only be selected from the list provided on the MoleAPI pricing page.
- If your Token is assigned to a Group, you can only select models available within that group.
- For available models and pricing details, see: Supported Models and Pricing.
If you are still not sure whether your account, group, and model configuration are all set up correctly, we recommend trying a full round of chat in the site first before connecting a third-party client or your own code:
If it still does not work, check these 4 things first
- Whether the Base URL is set to
https://api.moleapi.com/v1 - Whether the API Key is really the
sk-...created in the MoleAPI console - Whether the model name is entered correctly
- Whether the Group for the current Key supports that model
Most first-time issues for beginners usually come down to one of these.
There are two paths you can take next
You do not need to read all the documentation at once. Just continue based on your goal:
- Want to connect an existing AI app: Start with the AI Apps documentation and fill in the
Base URLandAPI Keyon the configuration page for your client - Want to write your own integration: Start with Developer Quickstart and get your first call working with a minimal request
What should you read next?
If you have already completed your first API call, here is what we recommend next based on your goal:
Basics
Understand the core concepts that are easiest to confuse, such as API Key, Base URL, Group, and billing.
Getting Started Tutorials
Continue learning about console features such as wallet, logs, model selection, and notifications.
AI App Integration
See how to configure MoleAPI in various client tools.
Developer API Docs
If you plan to write your own integration, start here for APIs and examples.
How is this guide?
Last updated on