Claude Code
Claude Code Tutorial — Connect Anthropic's terminal-based coding assistant to New API. Supports code understanding, multi-file editing, and integration with VS Code and JetBrains IDEs.
Project Overview
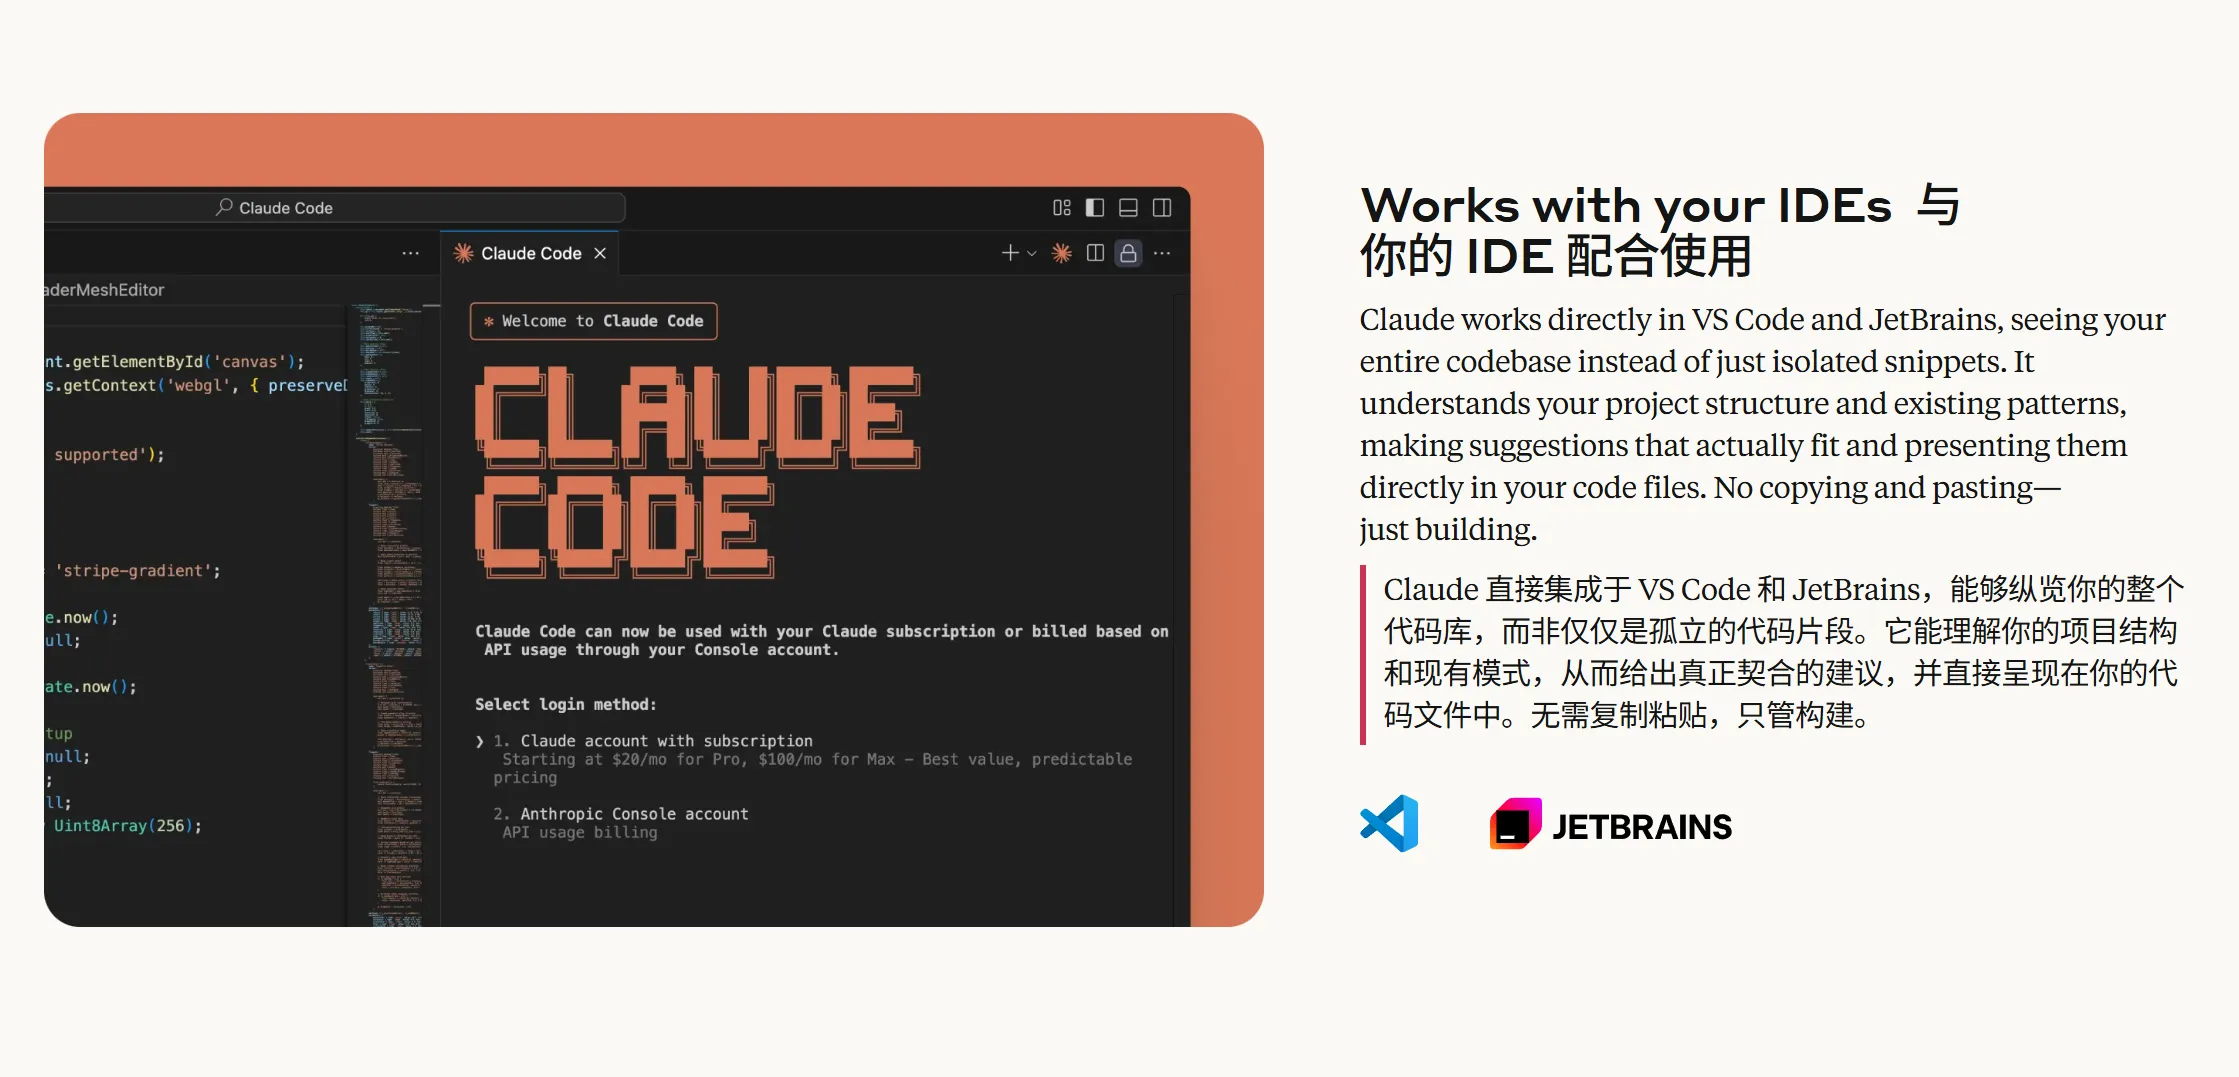
Unleash the full power of Claude directly in your terminal. Search through millions of lines of code instantly. Turn workflows that used to take hours into a single command. Your tools, your workflow, your codebase—evolving at the speed of thought.
- Official homepage: https://www.anthropic.com/claude-code
Demo
First-Time Installation Guide
If you have already completed installation, you can jump directly to the Connect to MoleAPI section for quick configuration.
Installation Path at a Glance
Claude Code currently recommends using the official native installer instead of the legacy npm install -g method.
Windows: Recommended to run the official installation script directly inPowerShell; no need to installNode.jsornpmin advancemacOS / Linux: Recommended to use the nativecurl | bashinstallation in the terminal- If this guide does not cover your system details, upgrades, uninstallation, or troubleshooting, see the official docs:
- English installation docs: https://code.claude.com/docs/en/setup
- Official Chinese overview: https://code.claude.com/docs/en-US/overview
Windows Step-by-Step Guide
1. Prerequisite: Install Git for Windows
According to the official documentation, Claude Code requires Git for Windows on Windows. In practice, you can launch it from PowerShell, CMD, or Git Bash; Git Bash is used under the hood for command execution.
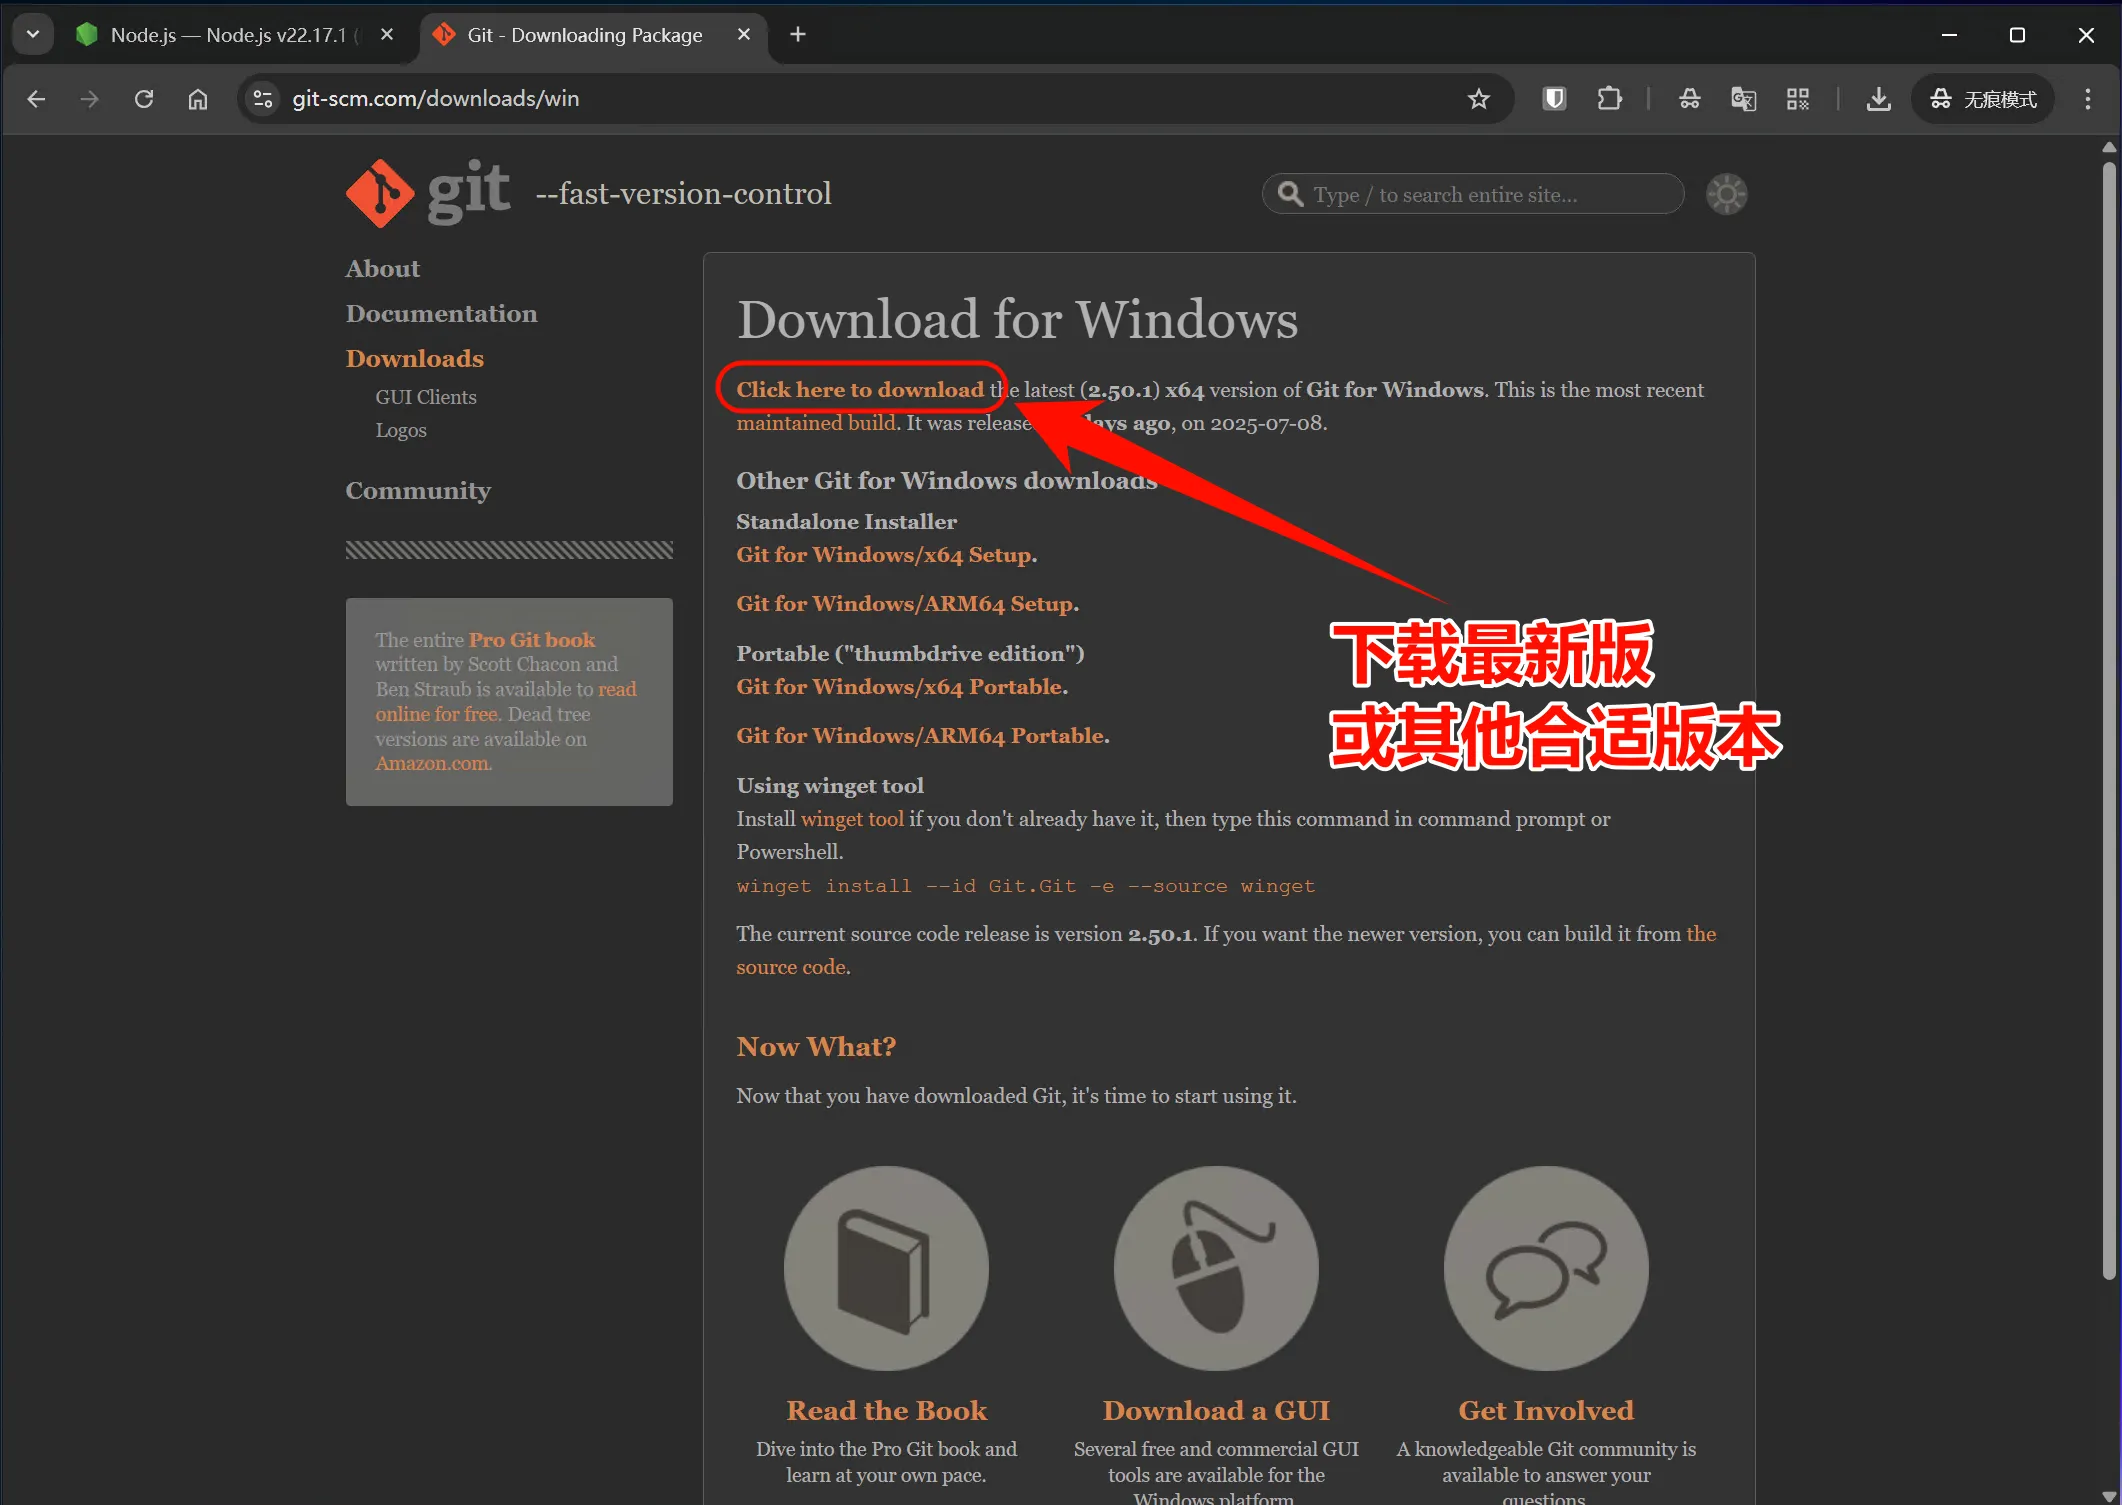
Download and Install Git for Windows
- Visit https://git-scm.com/downloads/win
- Click
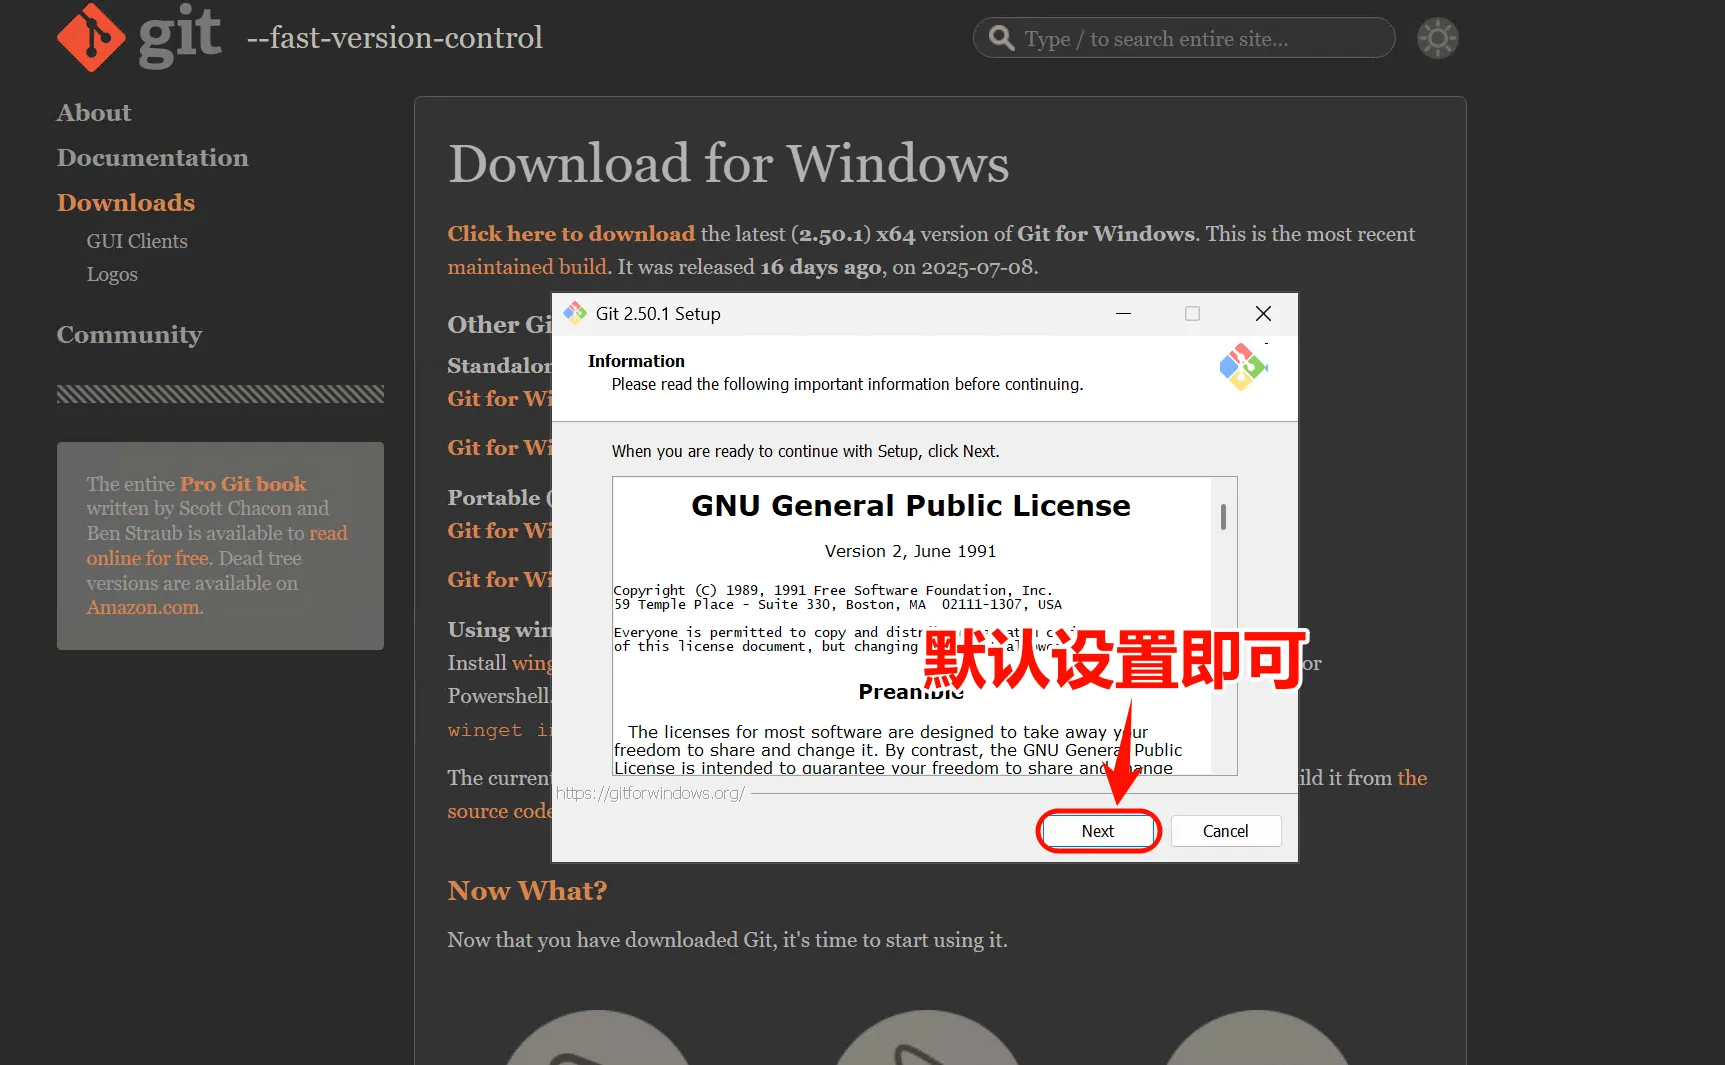
Download for Windows - Run the installer after the download completes
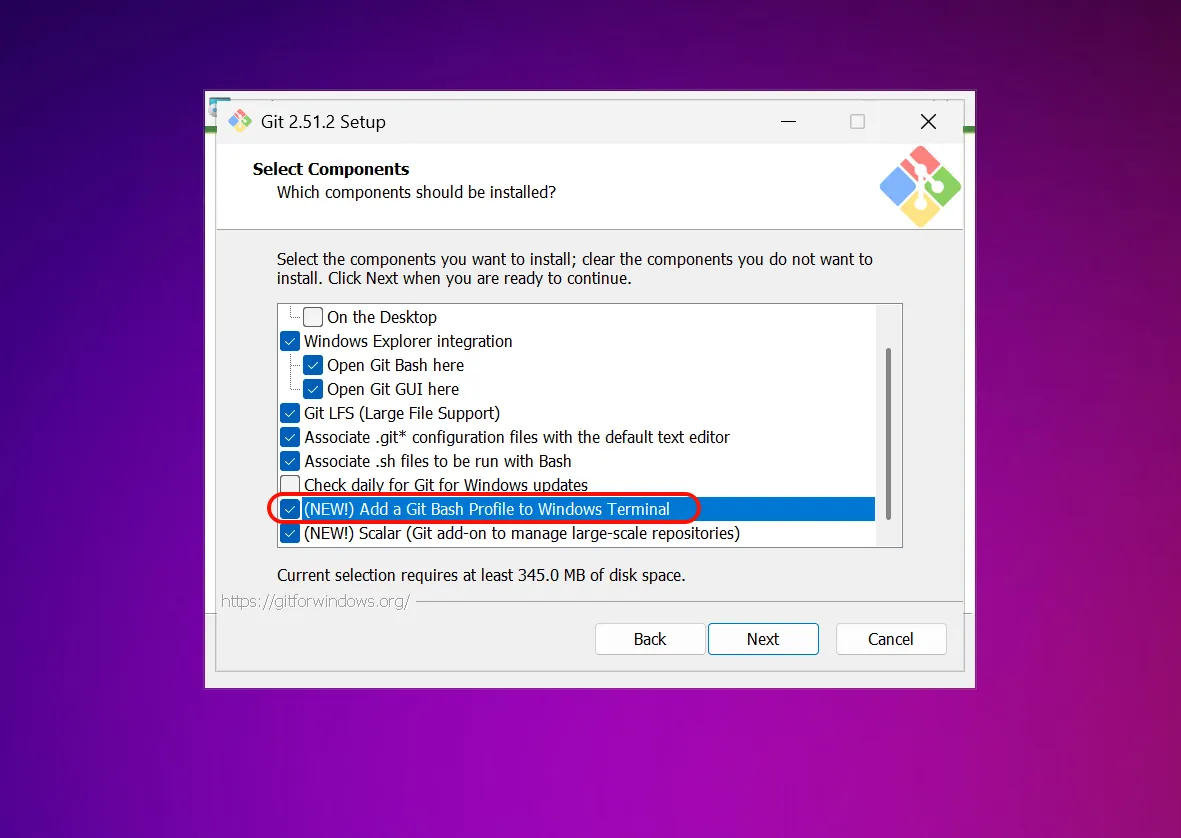
- In most cases, the default options are fine
On Windows, it is recommended to use PowerShell to run the installation command. The official recommendation currently prioritizes the native installer, so you generally do not need to install Node.js or npm beforehand, and you usually do not need to run PowerShell as administrator.
After installation, run the following command in PowerShell to confirm Git is available:
git --version2. Install Claude Code Natively with PowerShell
This is currently the most recommended installation method. It uses the official native installation script directly and does not depend on Node.js / npm.
Open PowerShell and run:
irm https://claude.ai/install.ps1 | iex3. Install Claude Code with CMD
If you prefer CMD, you can also use the official installation script directly.
Open CMD and run:
curl -fsSL https://claude.ai/install.cmd -o install.cmd && install.cmd && del install.cmdYou can also use:
winget install Anthropic.ClaudeCodeHowever, for Windows users, this guide still recommends using the PowerShell native installation flow above first.
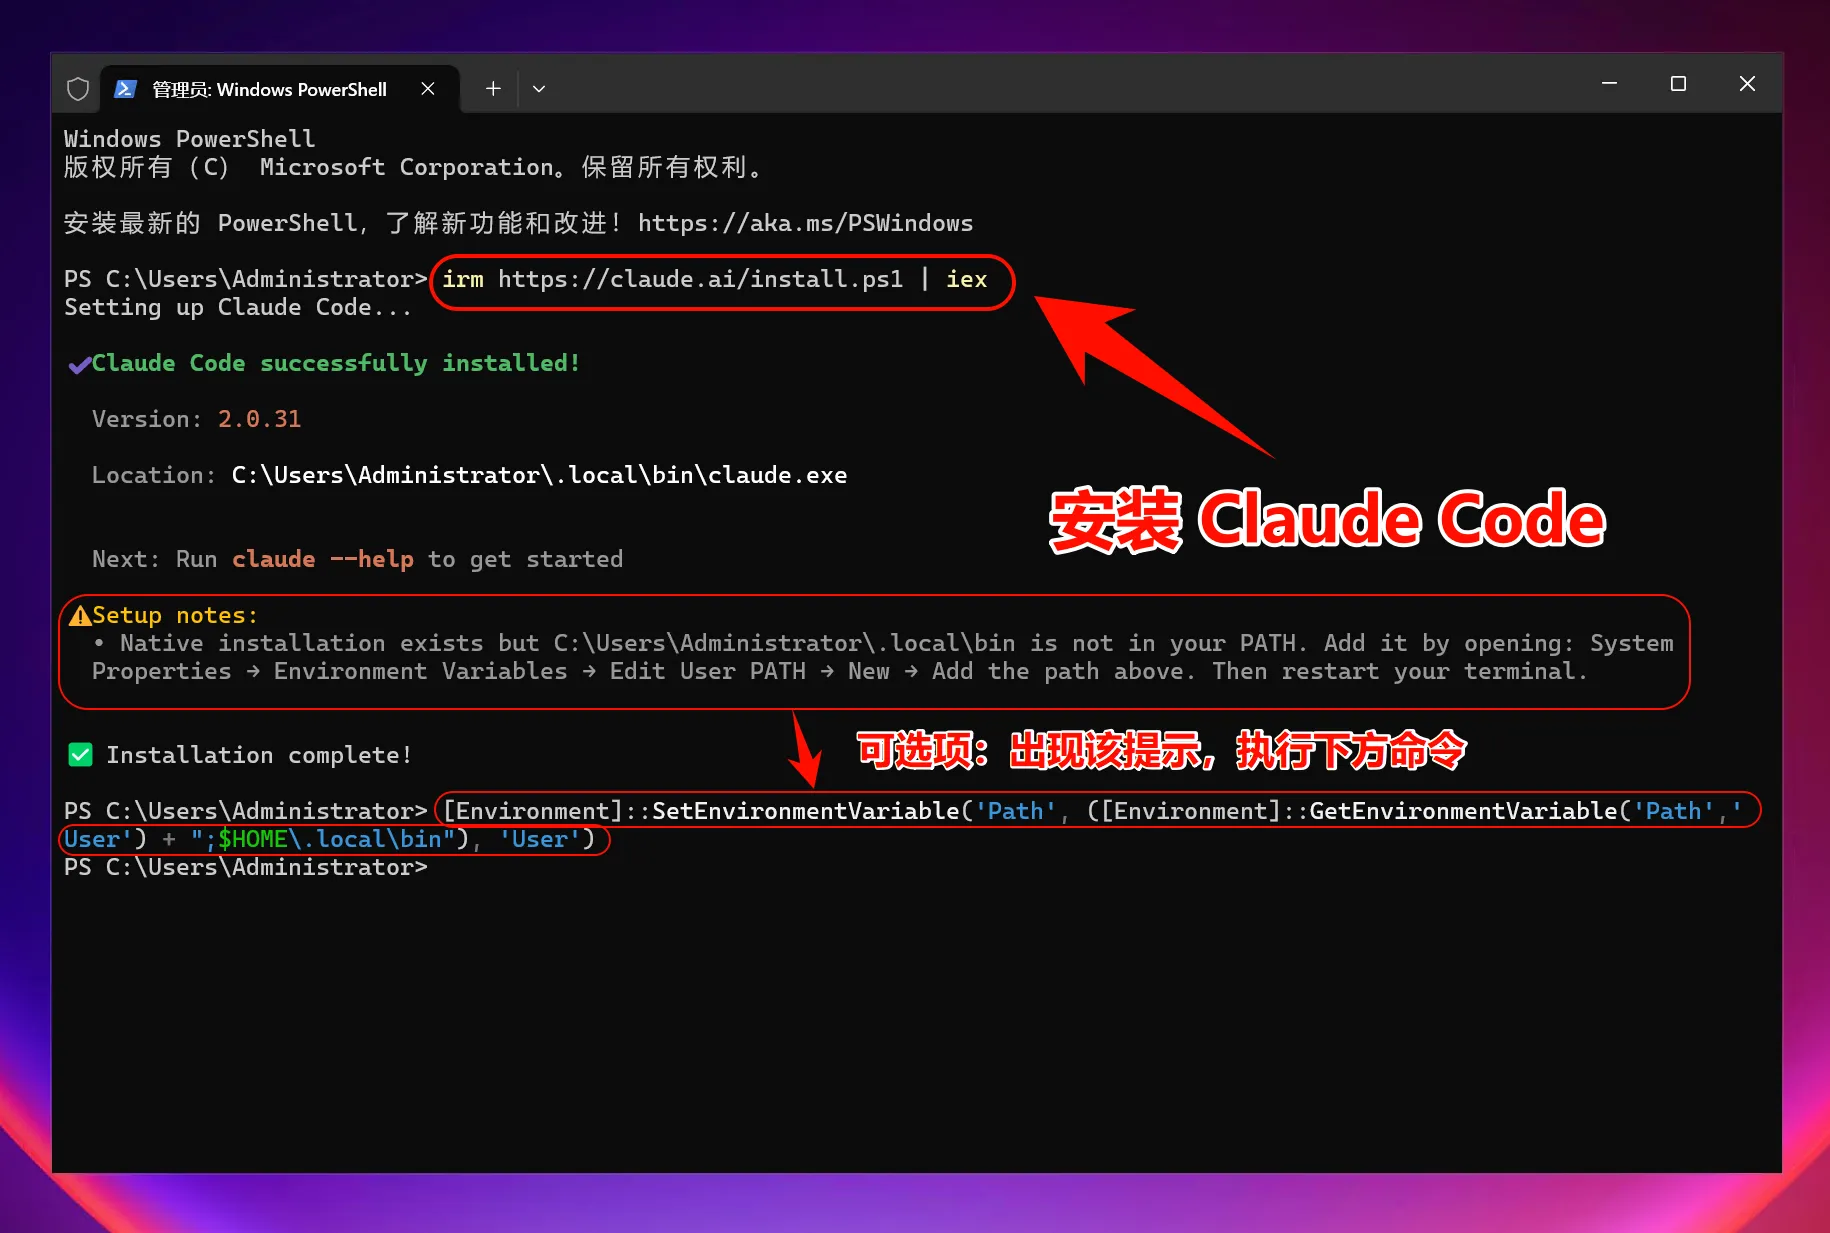
If the Installer Prompts You to Add Environment Variables Manually
In some environments, the claude command may not be recognized immediately after installation. If the installer or terminal prompts you to update PATH manually, add ~/.local/bin to your user environment variables.
A common command is:
[Environment]::SetEnvironmentVariable('Path', ([Environment]::GetEnvironmentVariable('Path','User') + ";$HOME\.local\bin"), 'User')After applying it, reopen your terminal and run claude --version again.
4. Fallback Option: Install with Node.js / npm
If your environment currently requires npm, you can still use the legacy global installation method. However, based on the official recommendation order, this option has lower priority than the PowerShell native installation above.
First, visit https://nodejs.org/ to download the LTS version and complete the installation, then confirm in the terminal:
node --version
npm --version
Then run:
npm install -g @anthropic-ai/claude-codeAbout the Legacy Method
The npm installation method still works, but it is no longer the officially preferred installation path. Unless you have specific compatibility requirements, the PowerShell native installation command above is recommended.
After installation, run in PowerShell:
claude --version
claude doctor
The first command confirms the version, and the second checks the current installation and configuration status in more detail.
If Claude Code cannot automatically locate Git Bash, add the following to settings.json:
{
"env": {
"CLAUDE_CODE_GIT_BASH_PATH": "C:\\Program Files\\Git\\bin\\bash.exe"
}
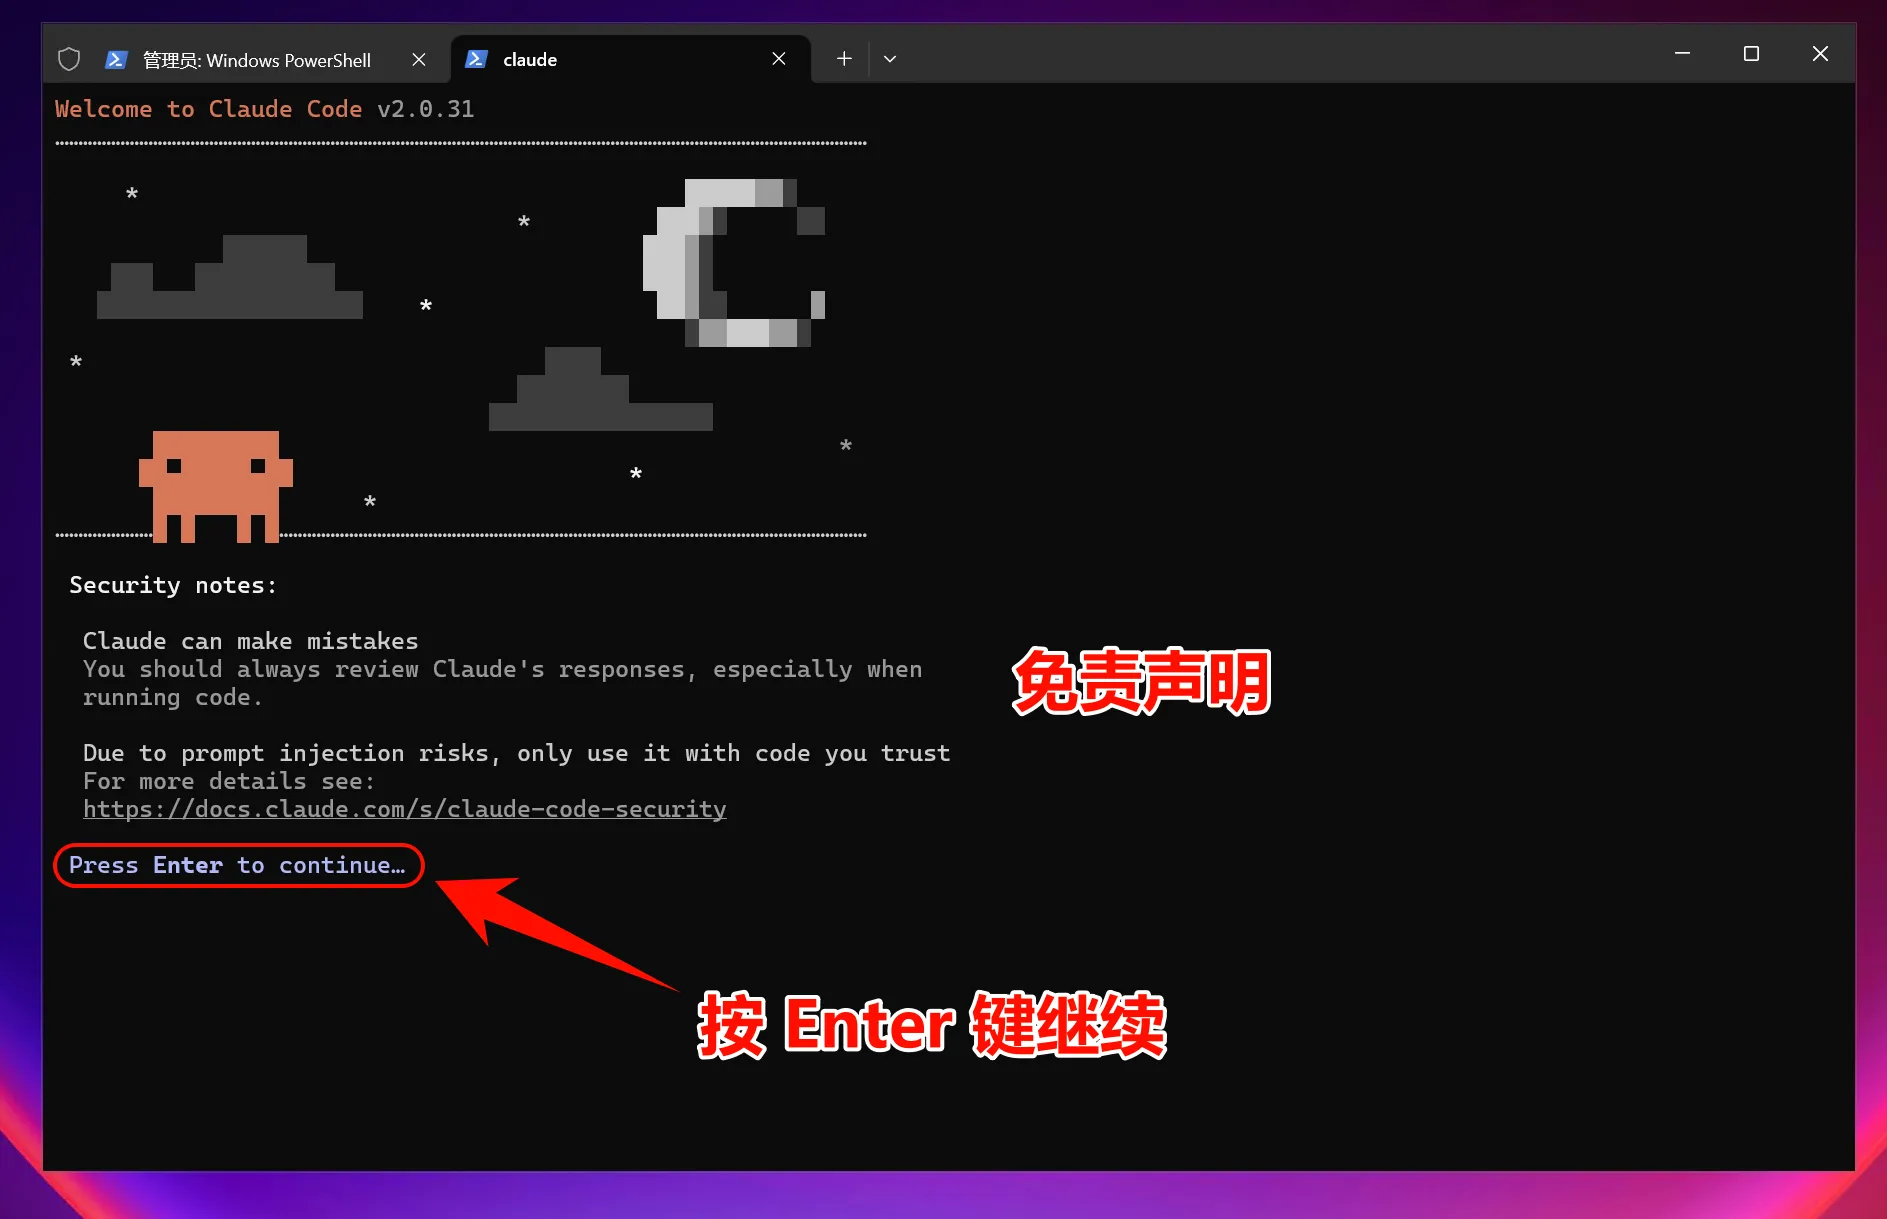
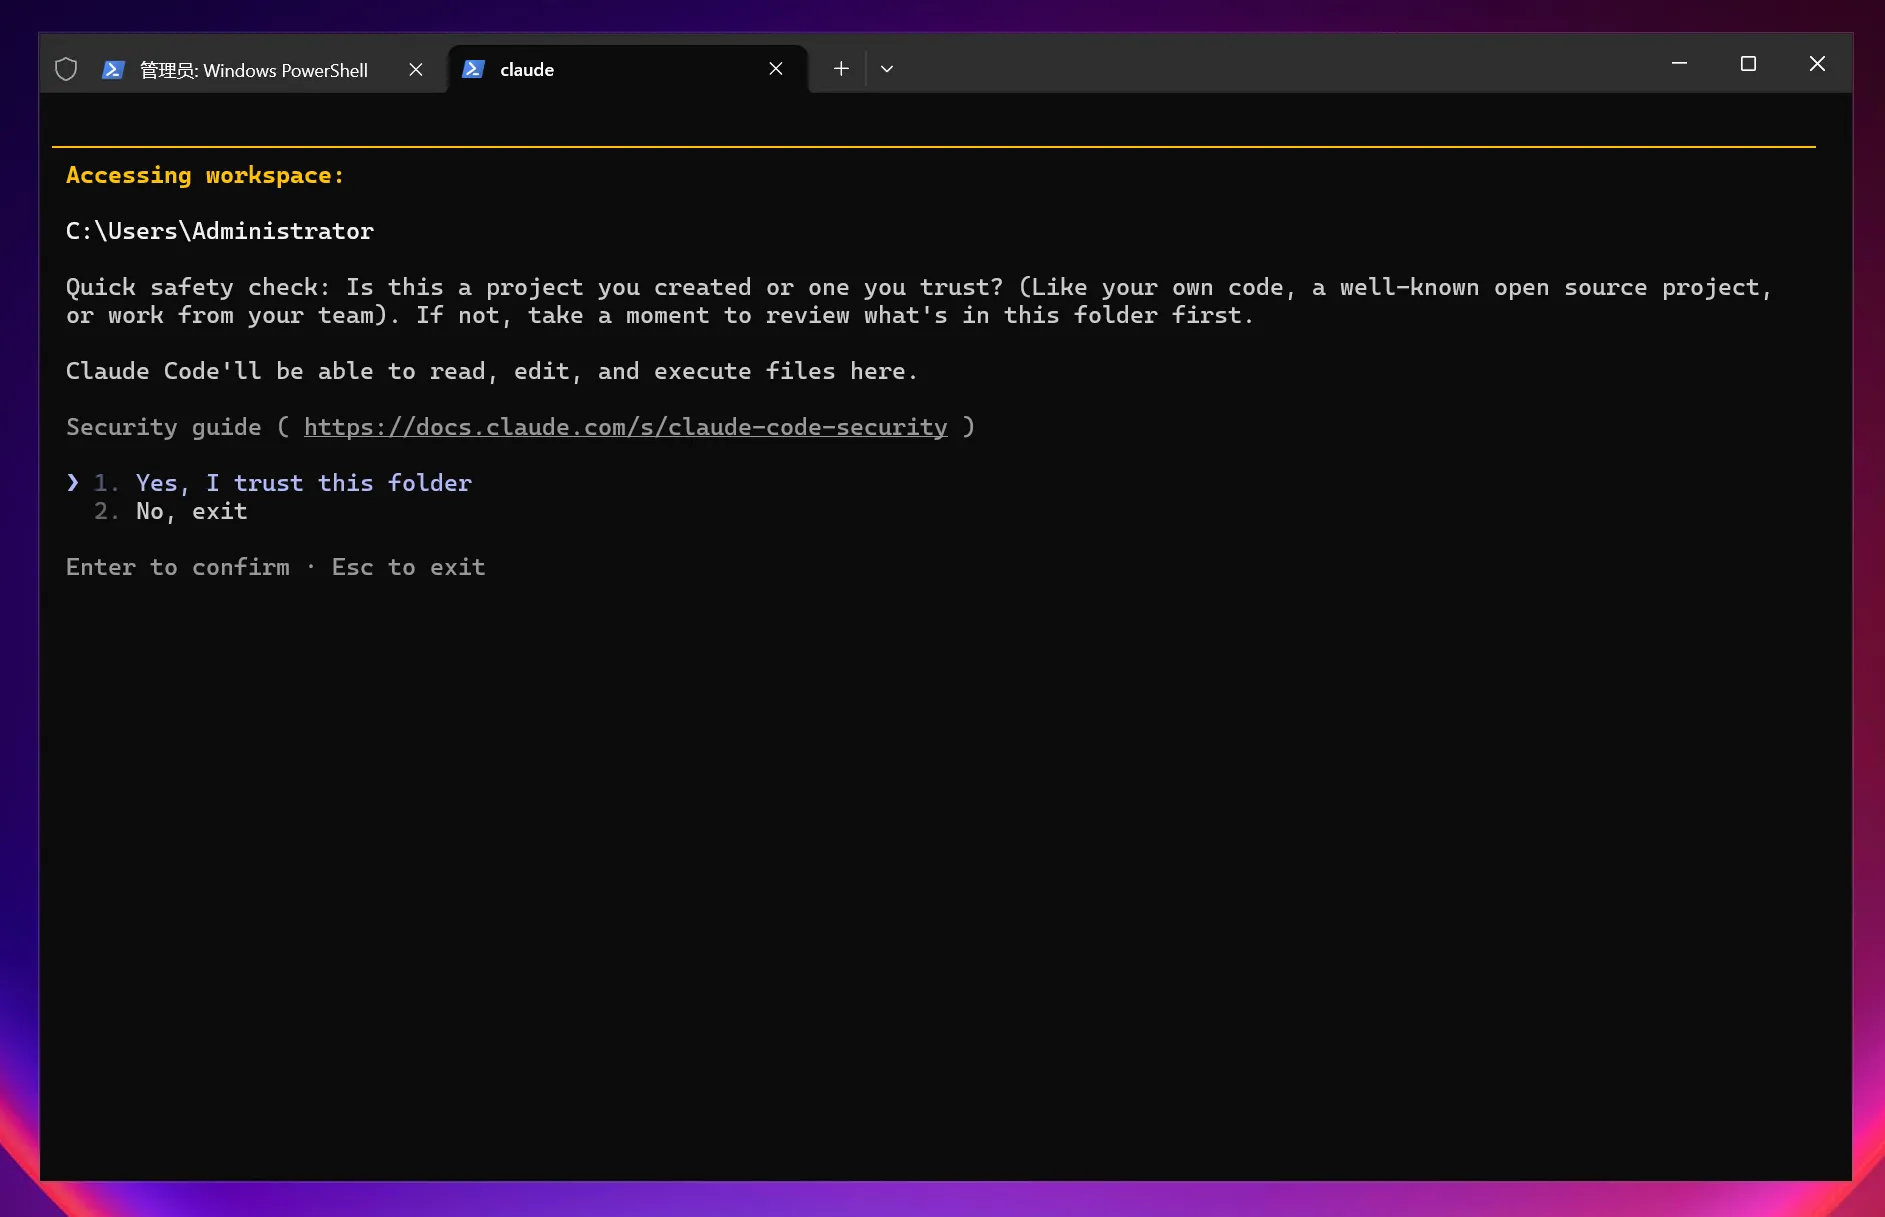
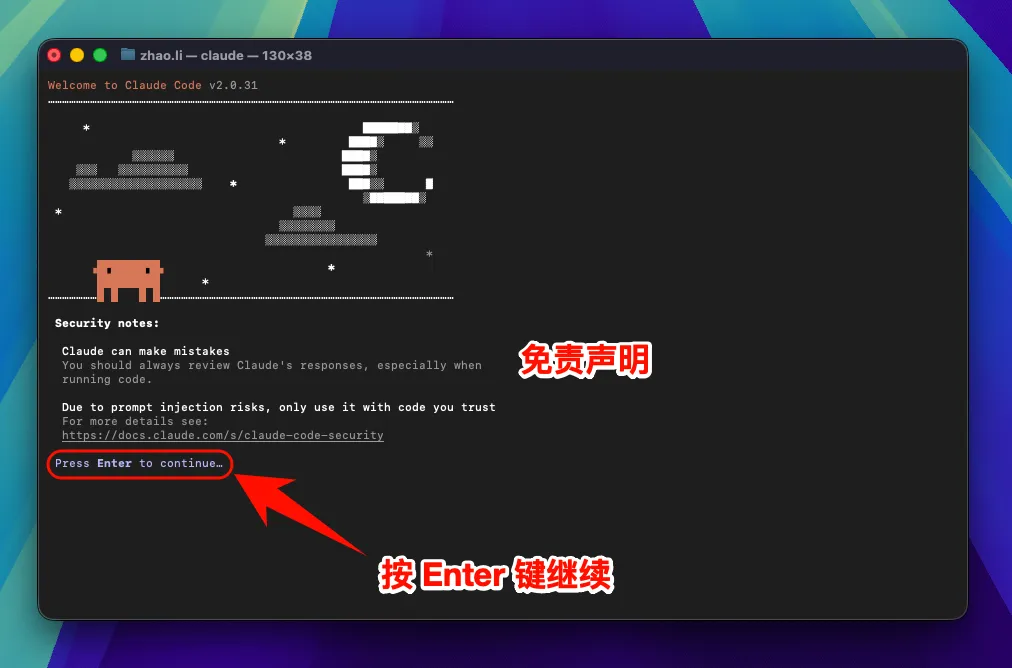
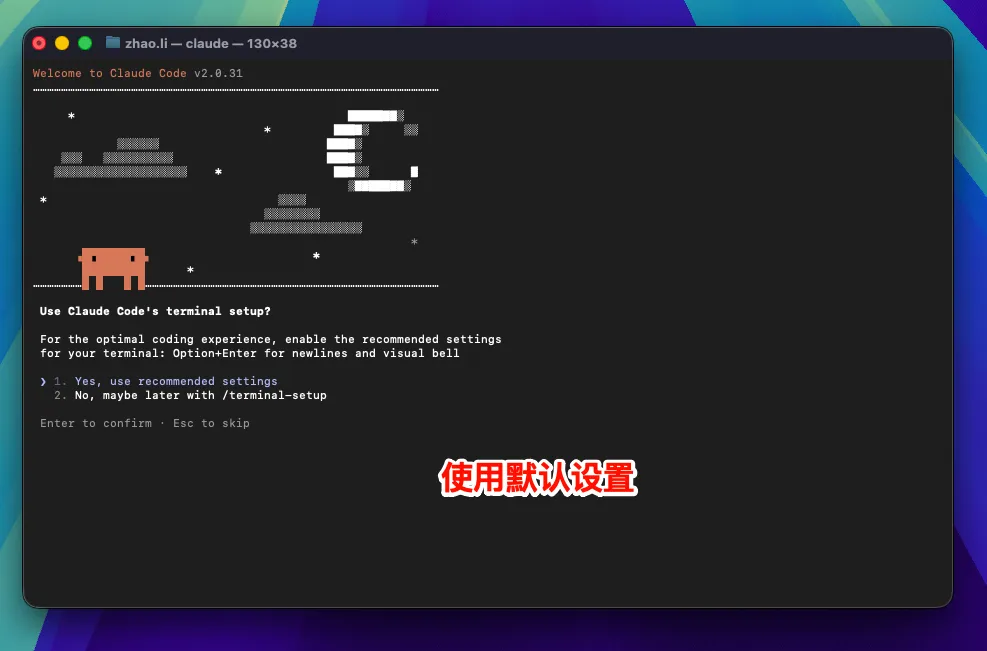
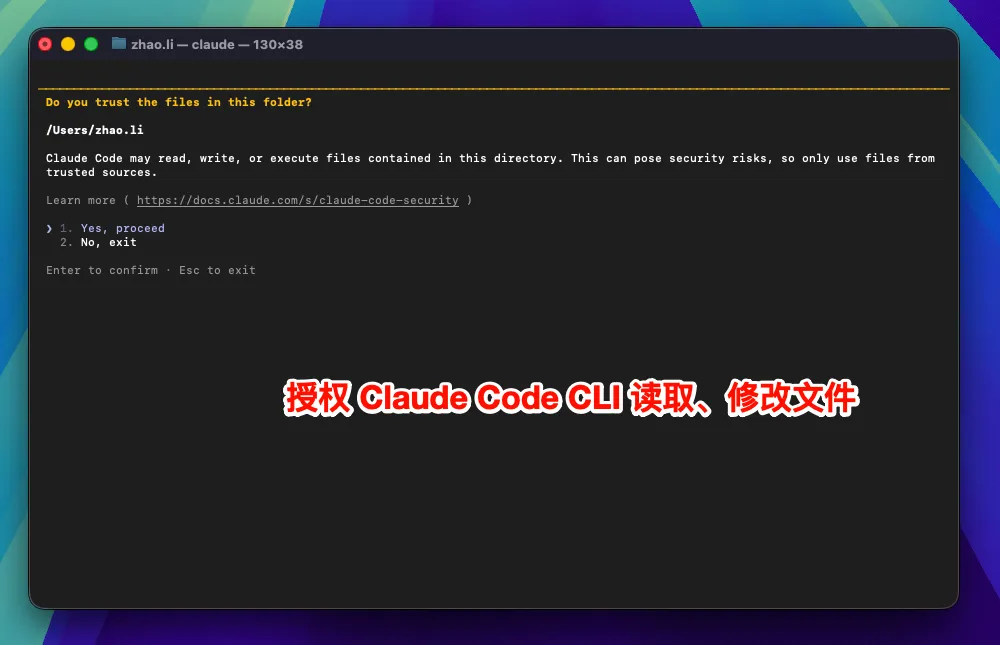
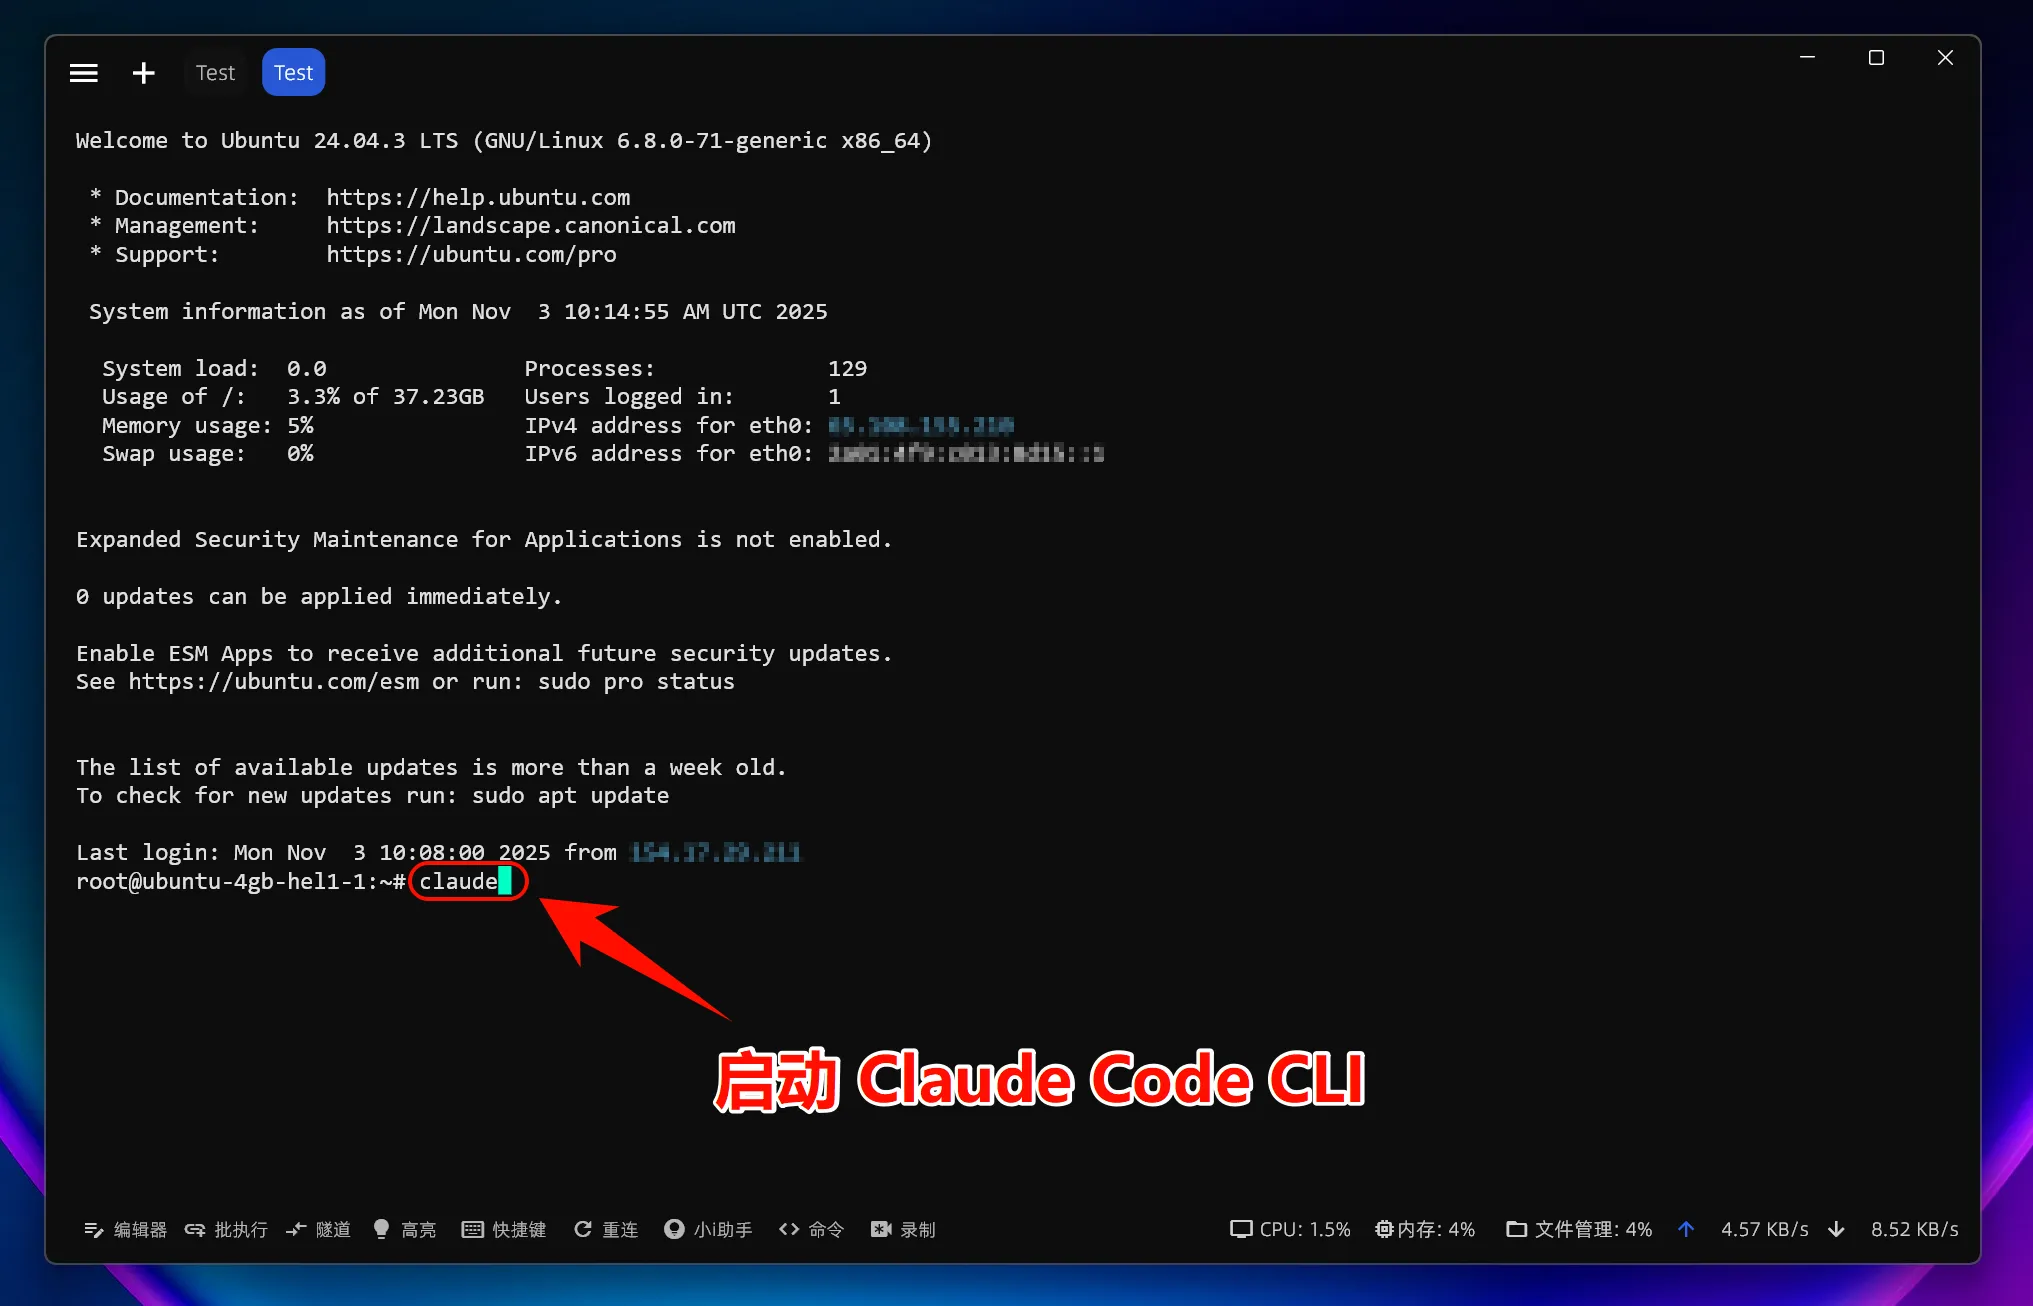
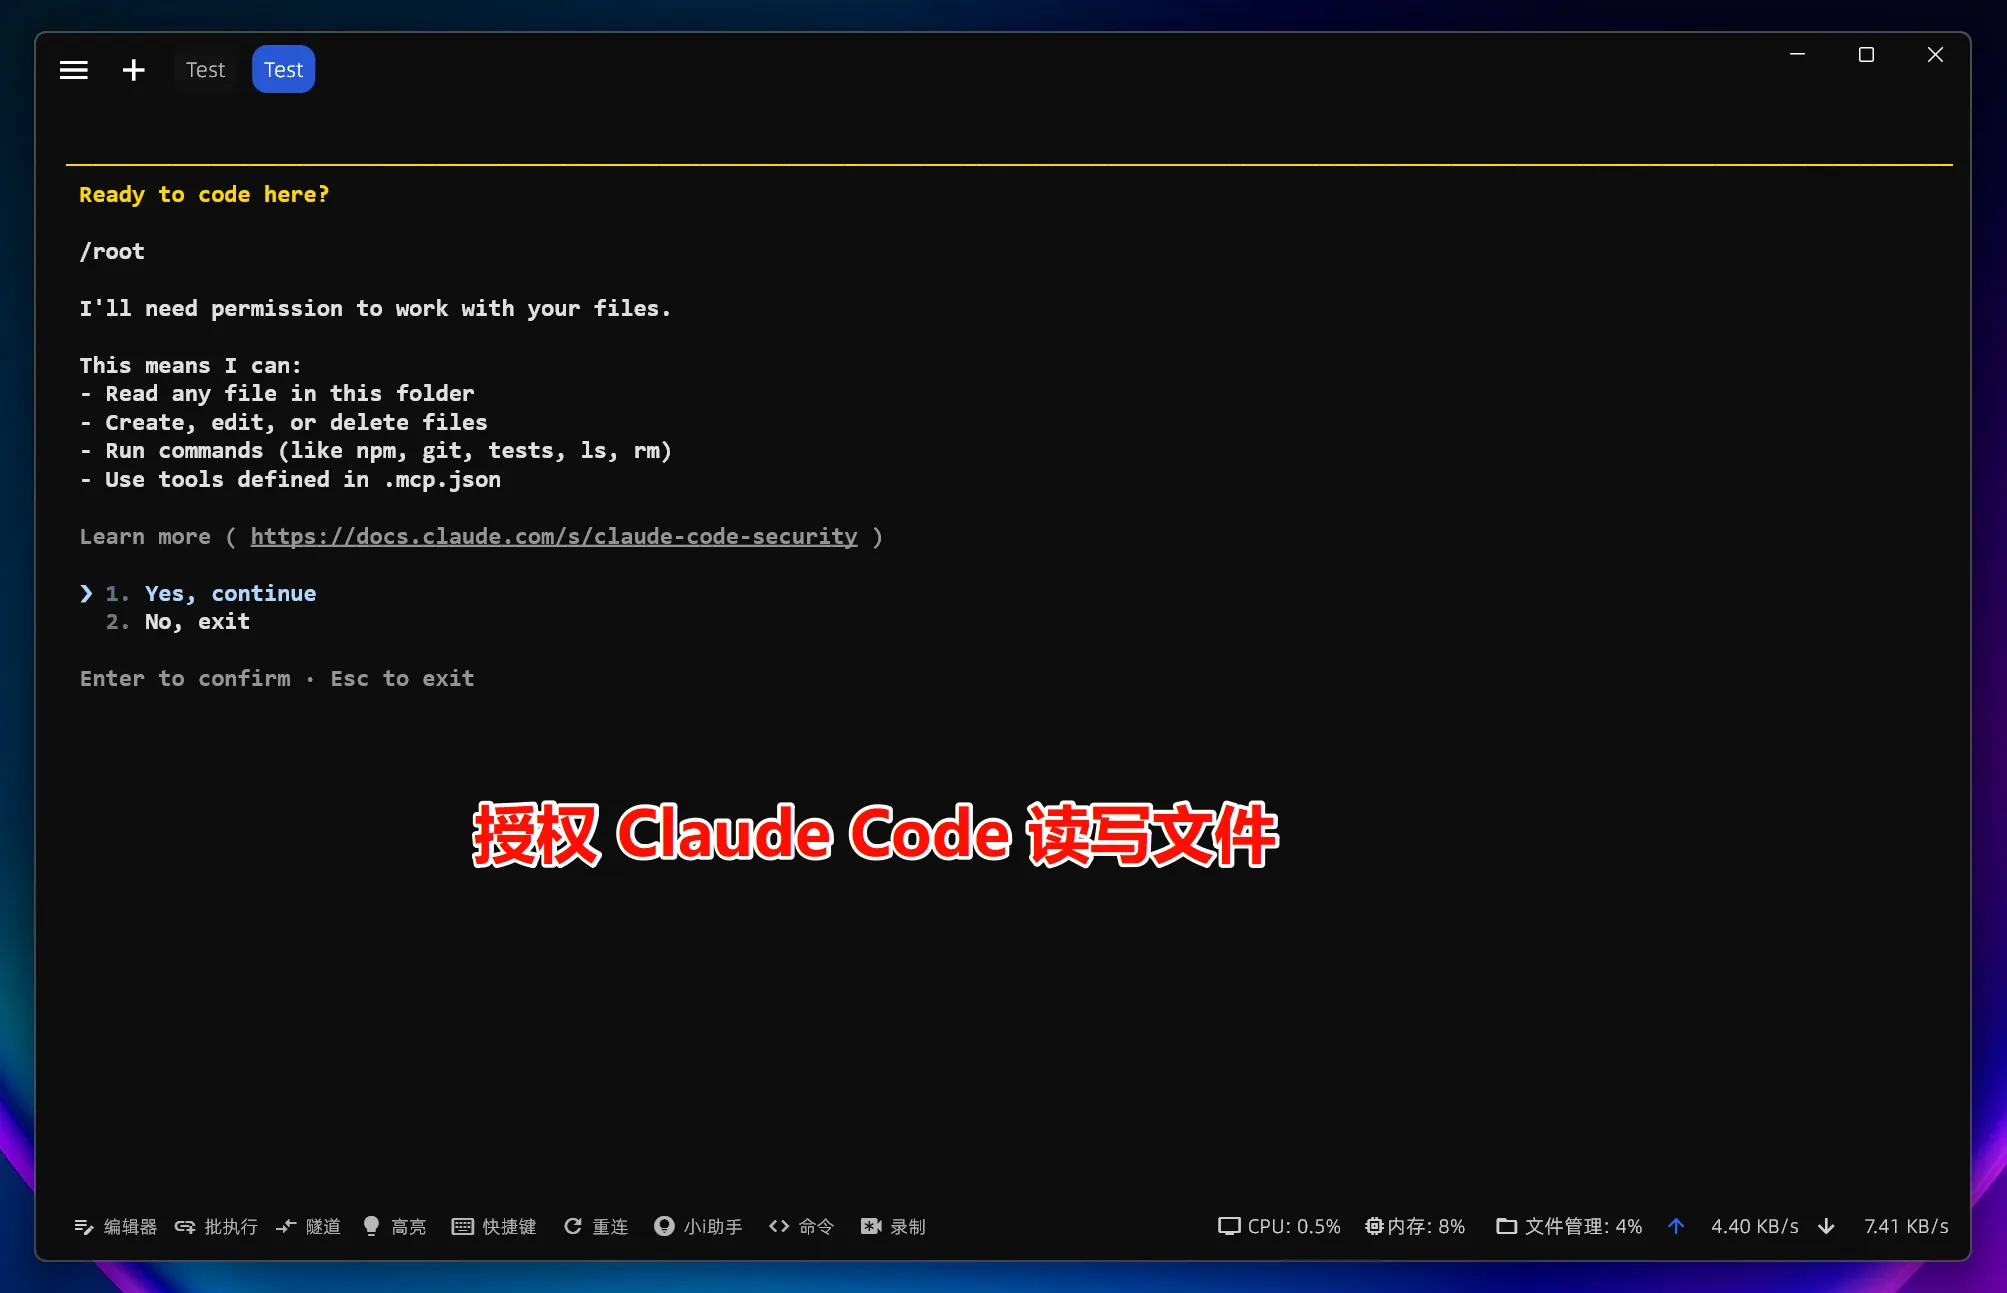
}5. Launch Claude Code
After installation and configuration are complete, run:
claudeTo use it in a project directory:
cd C:\path\to\your\project
claude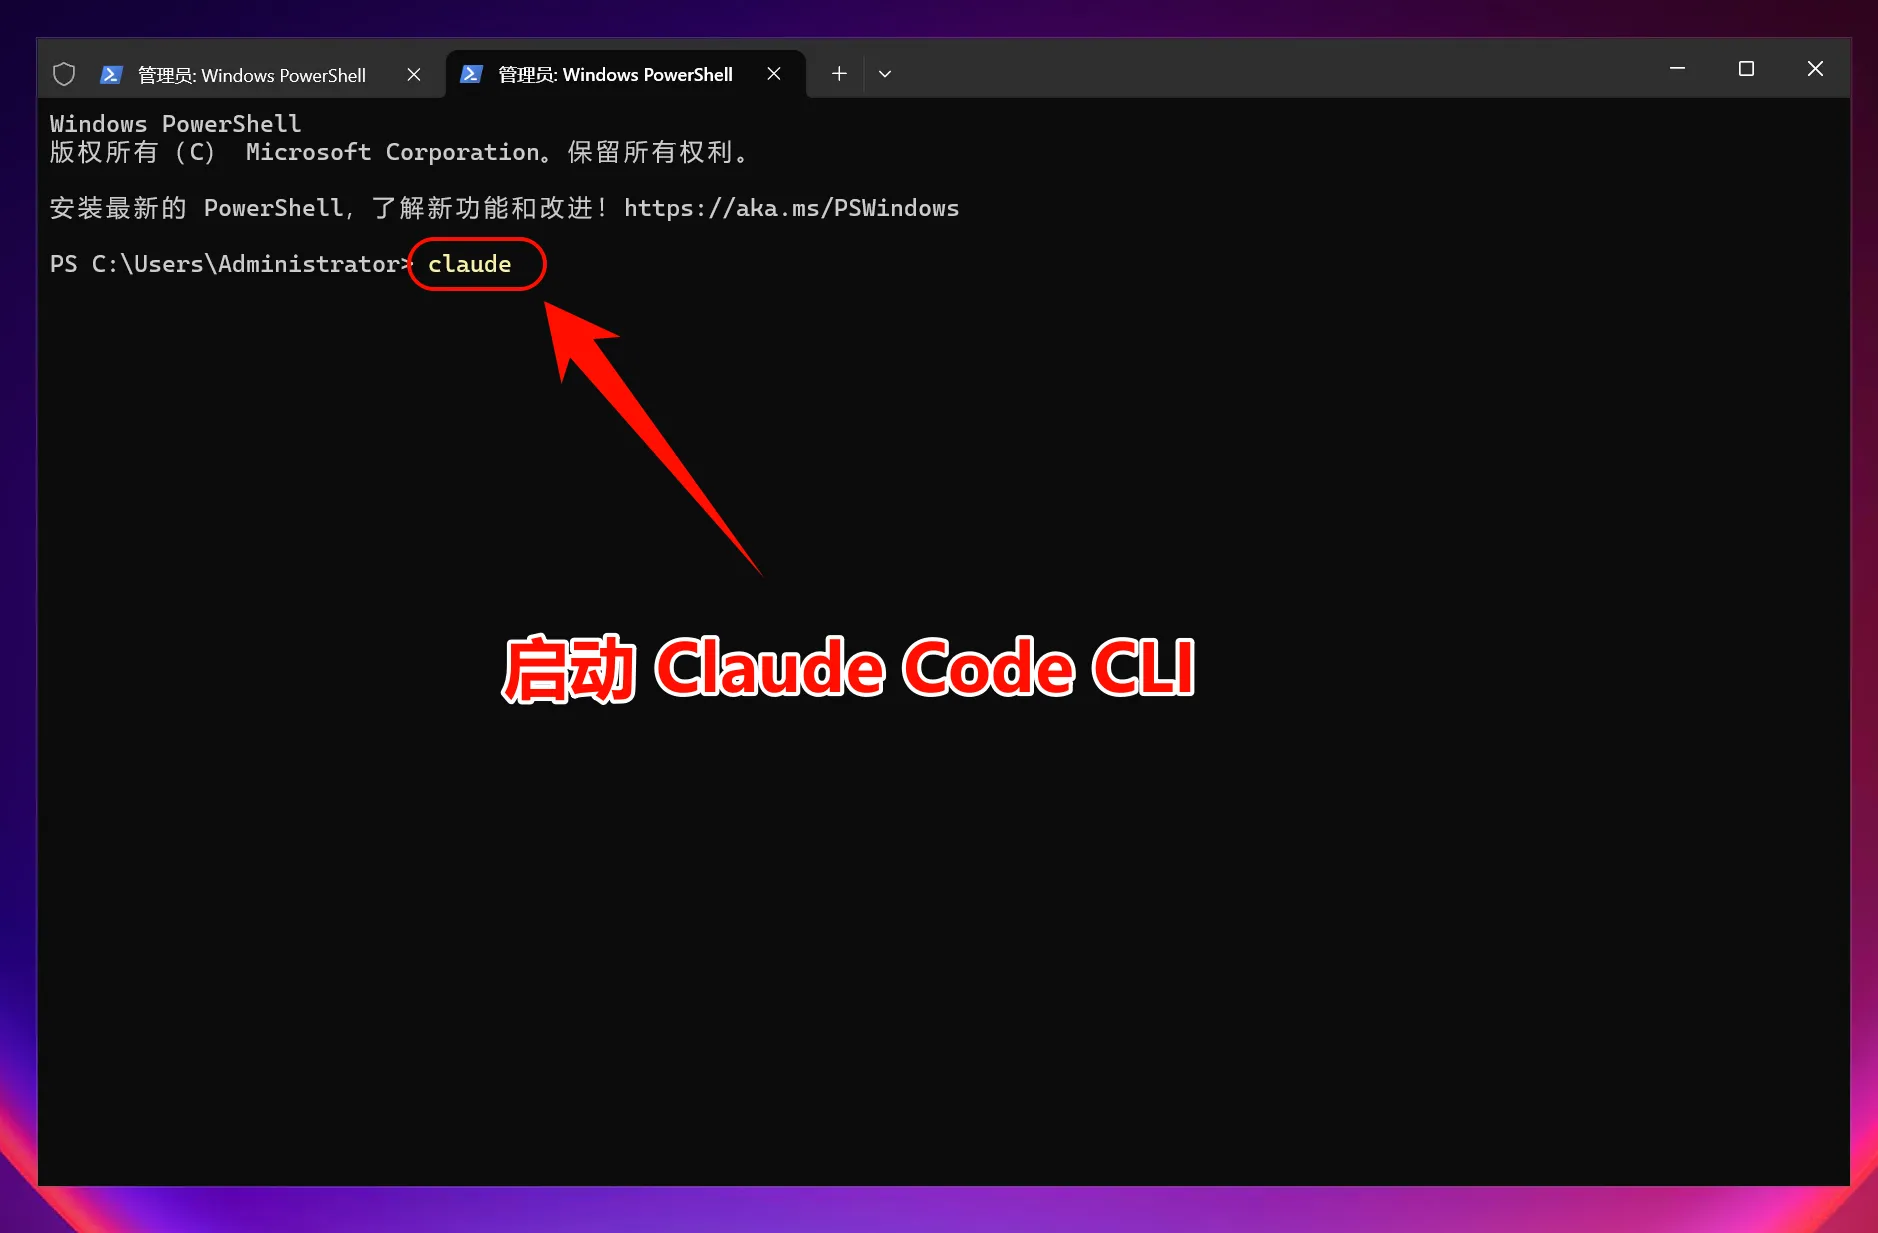
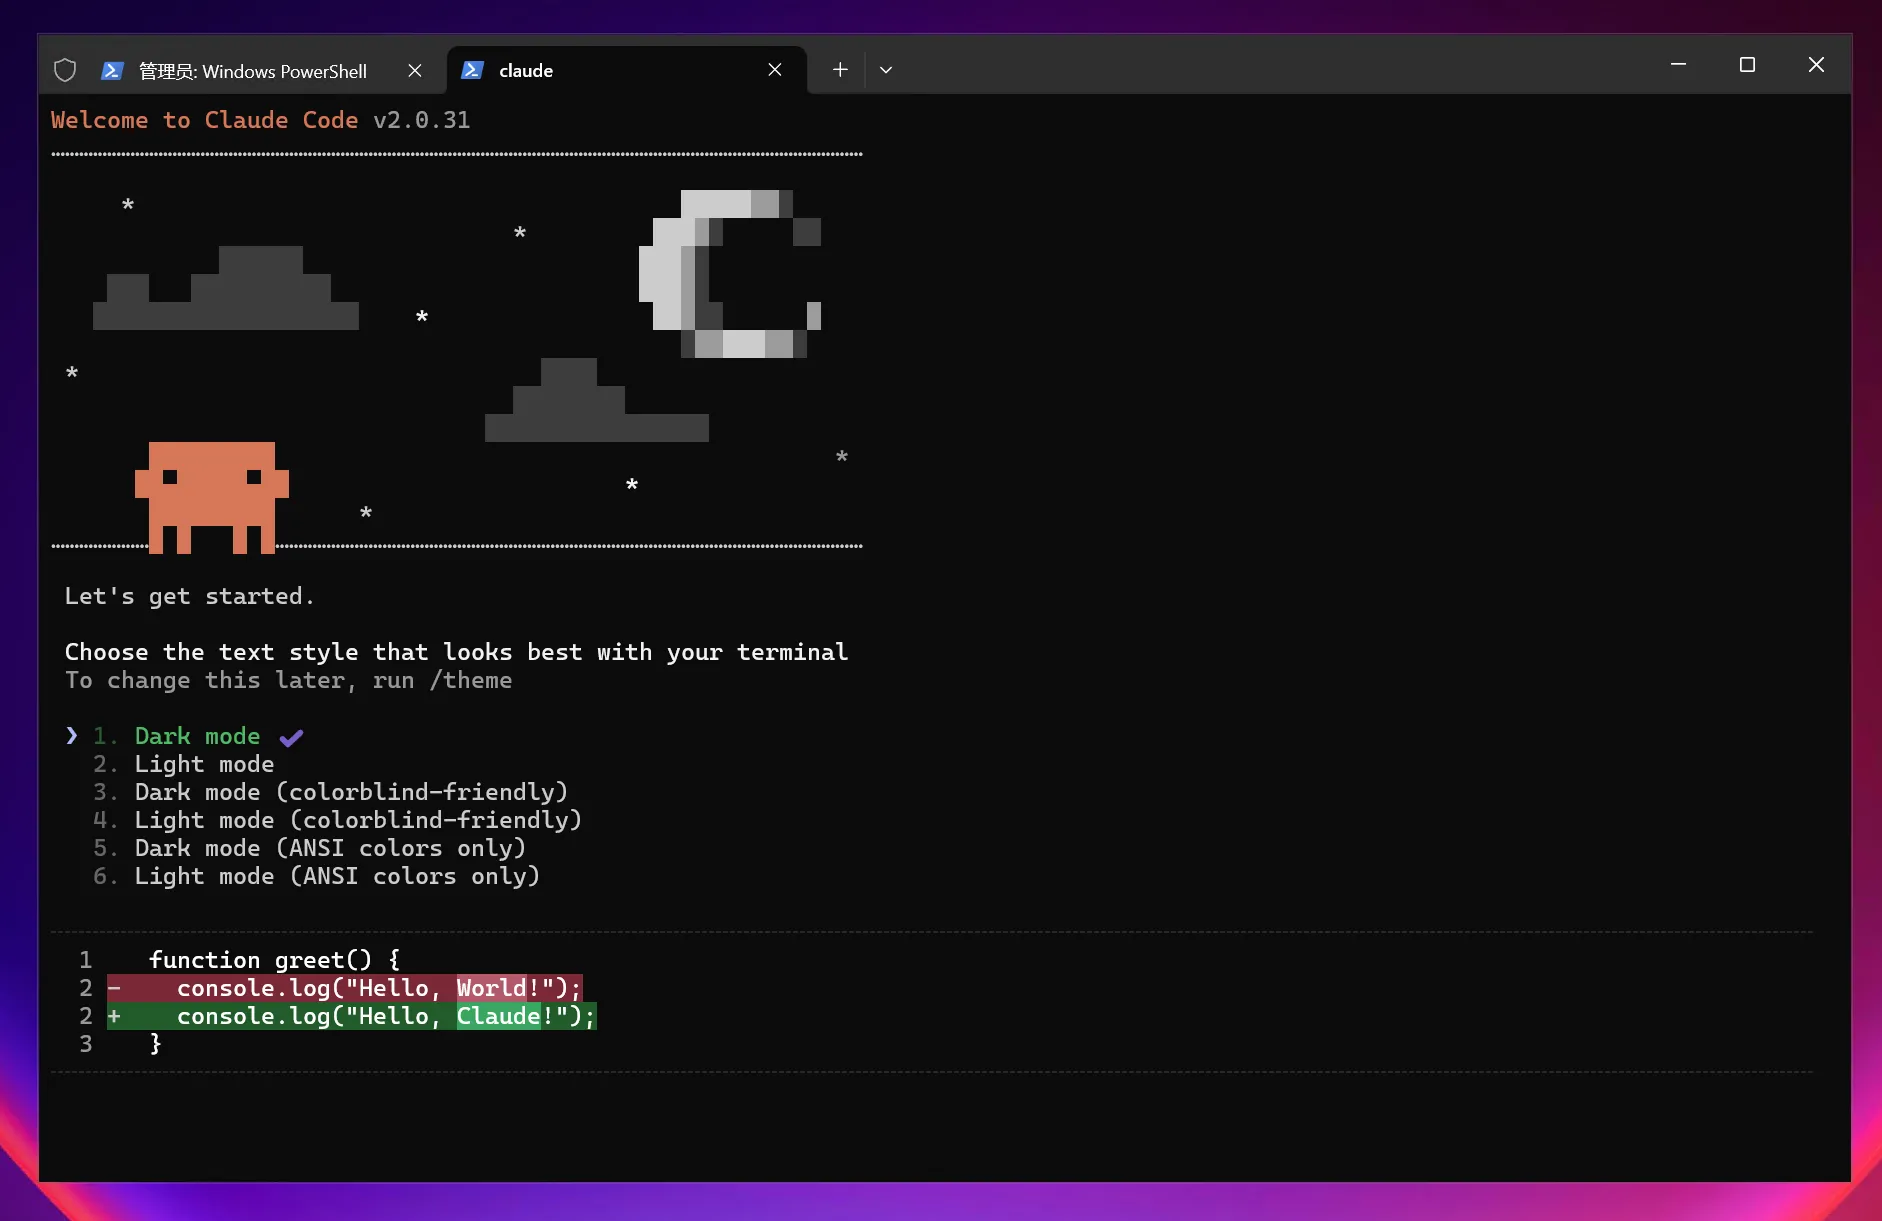
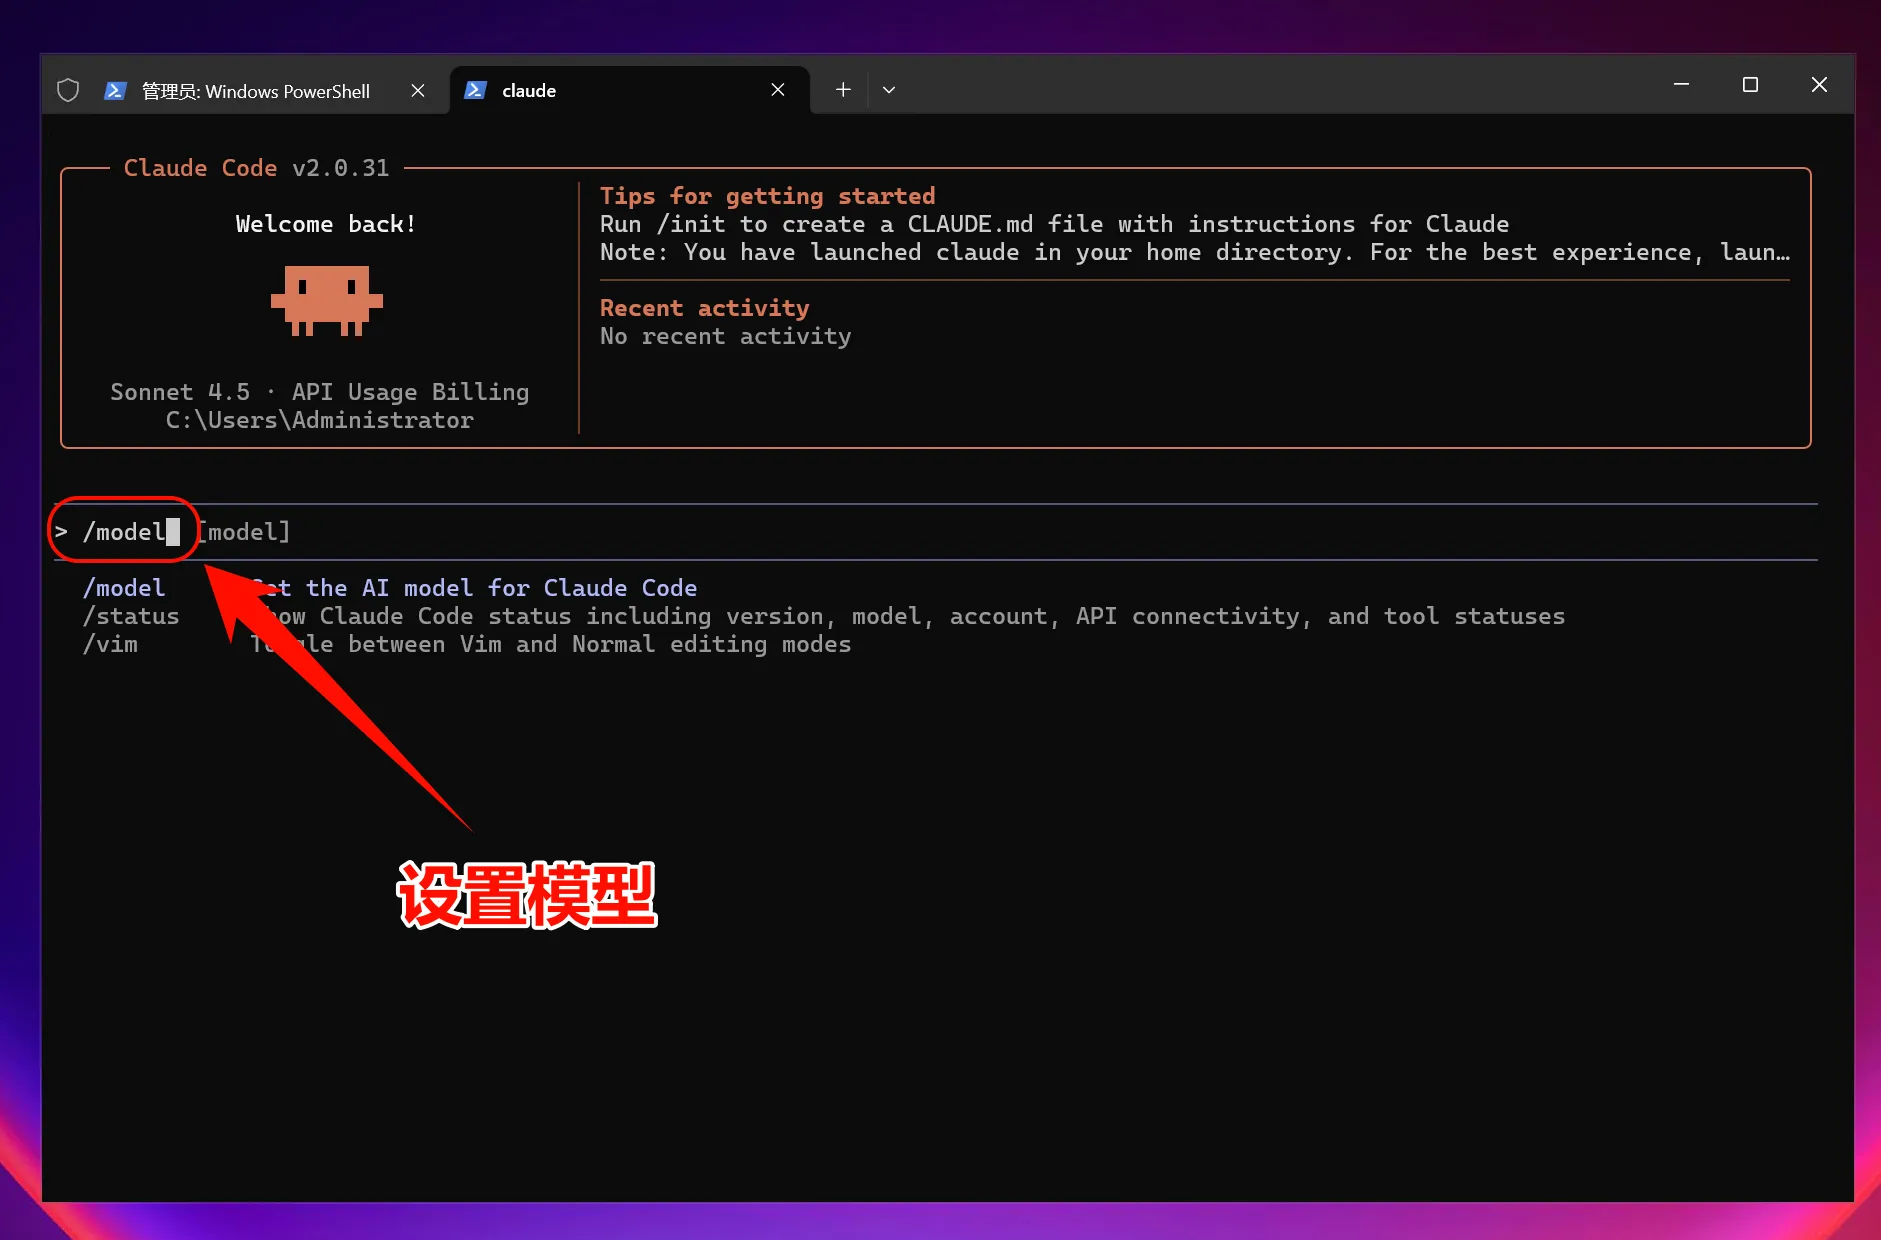
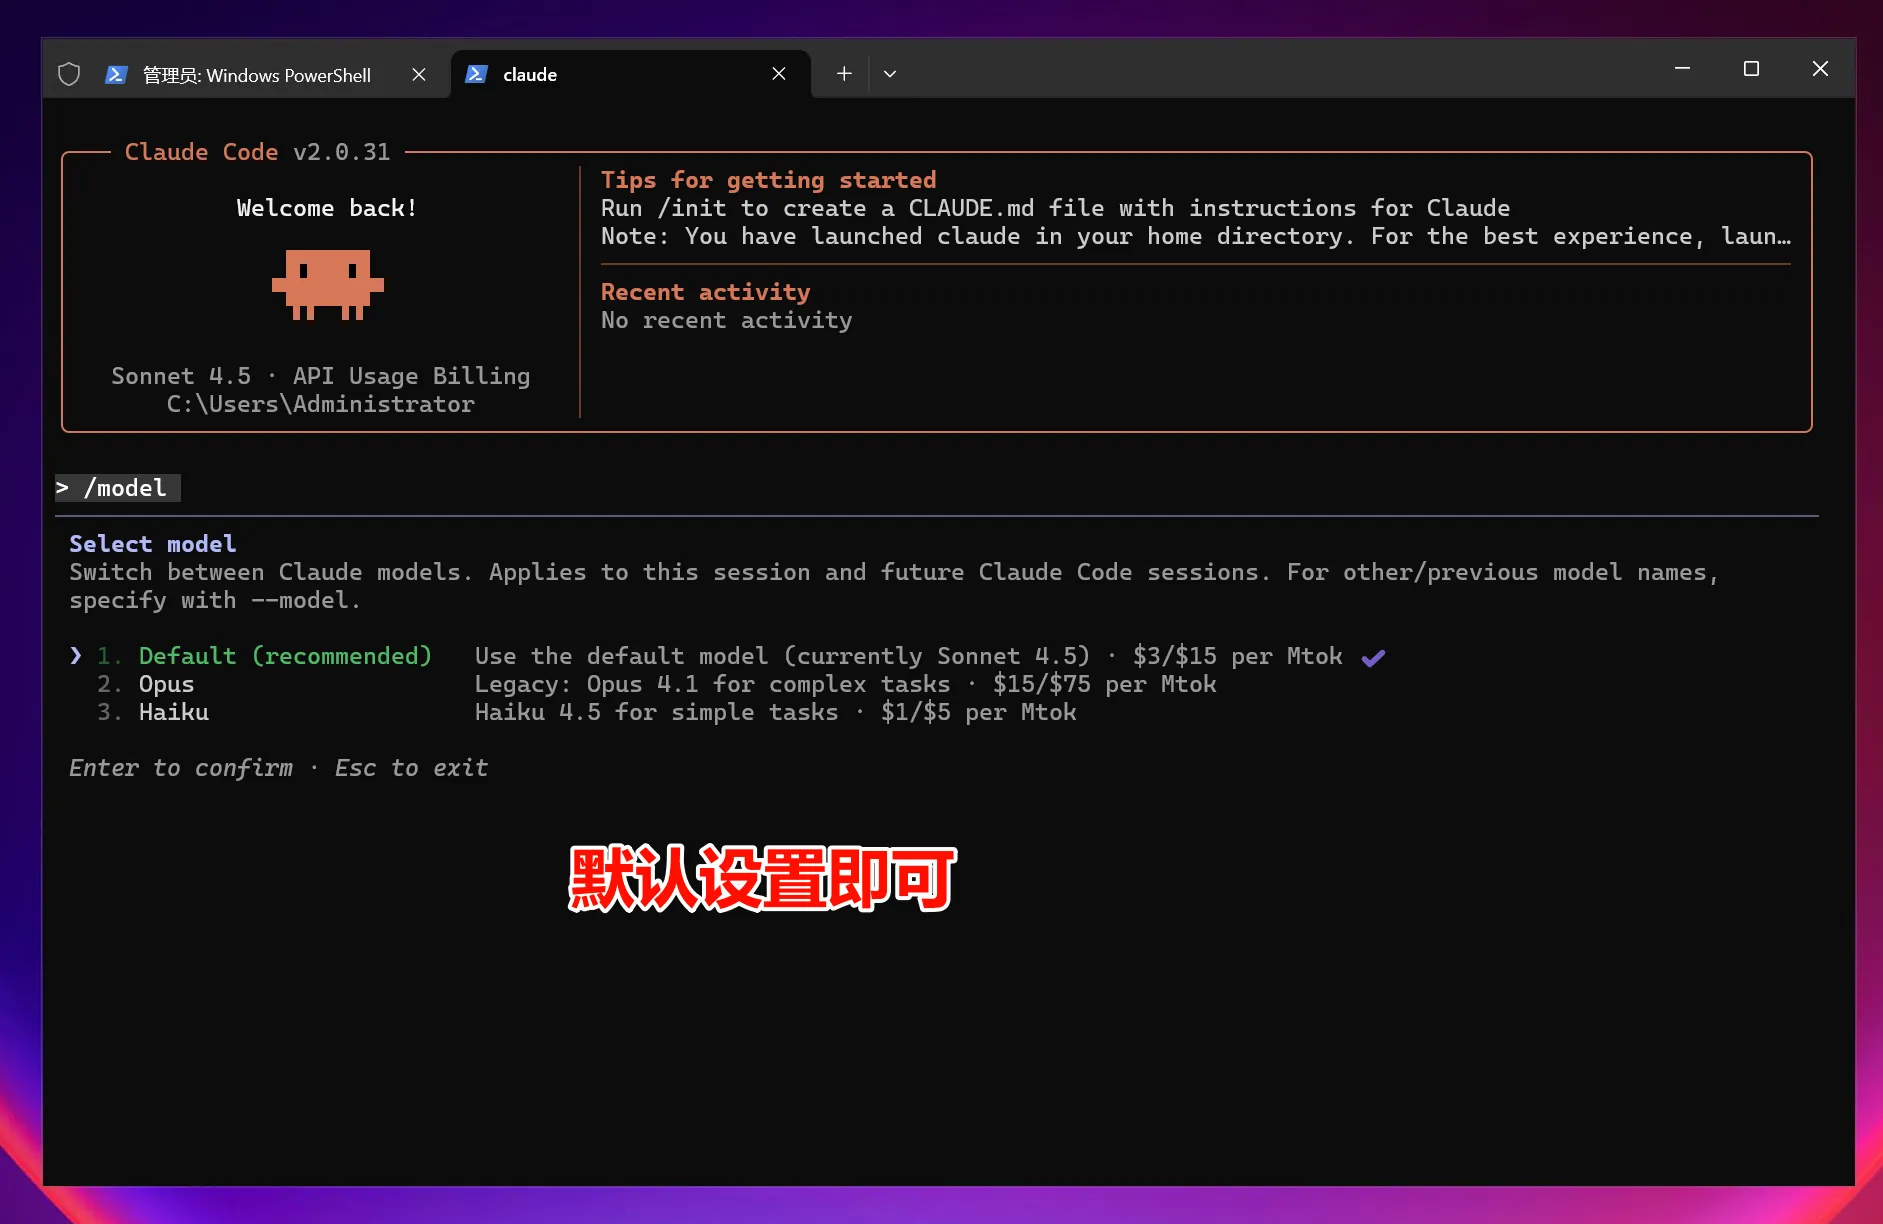
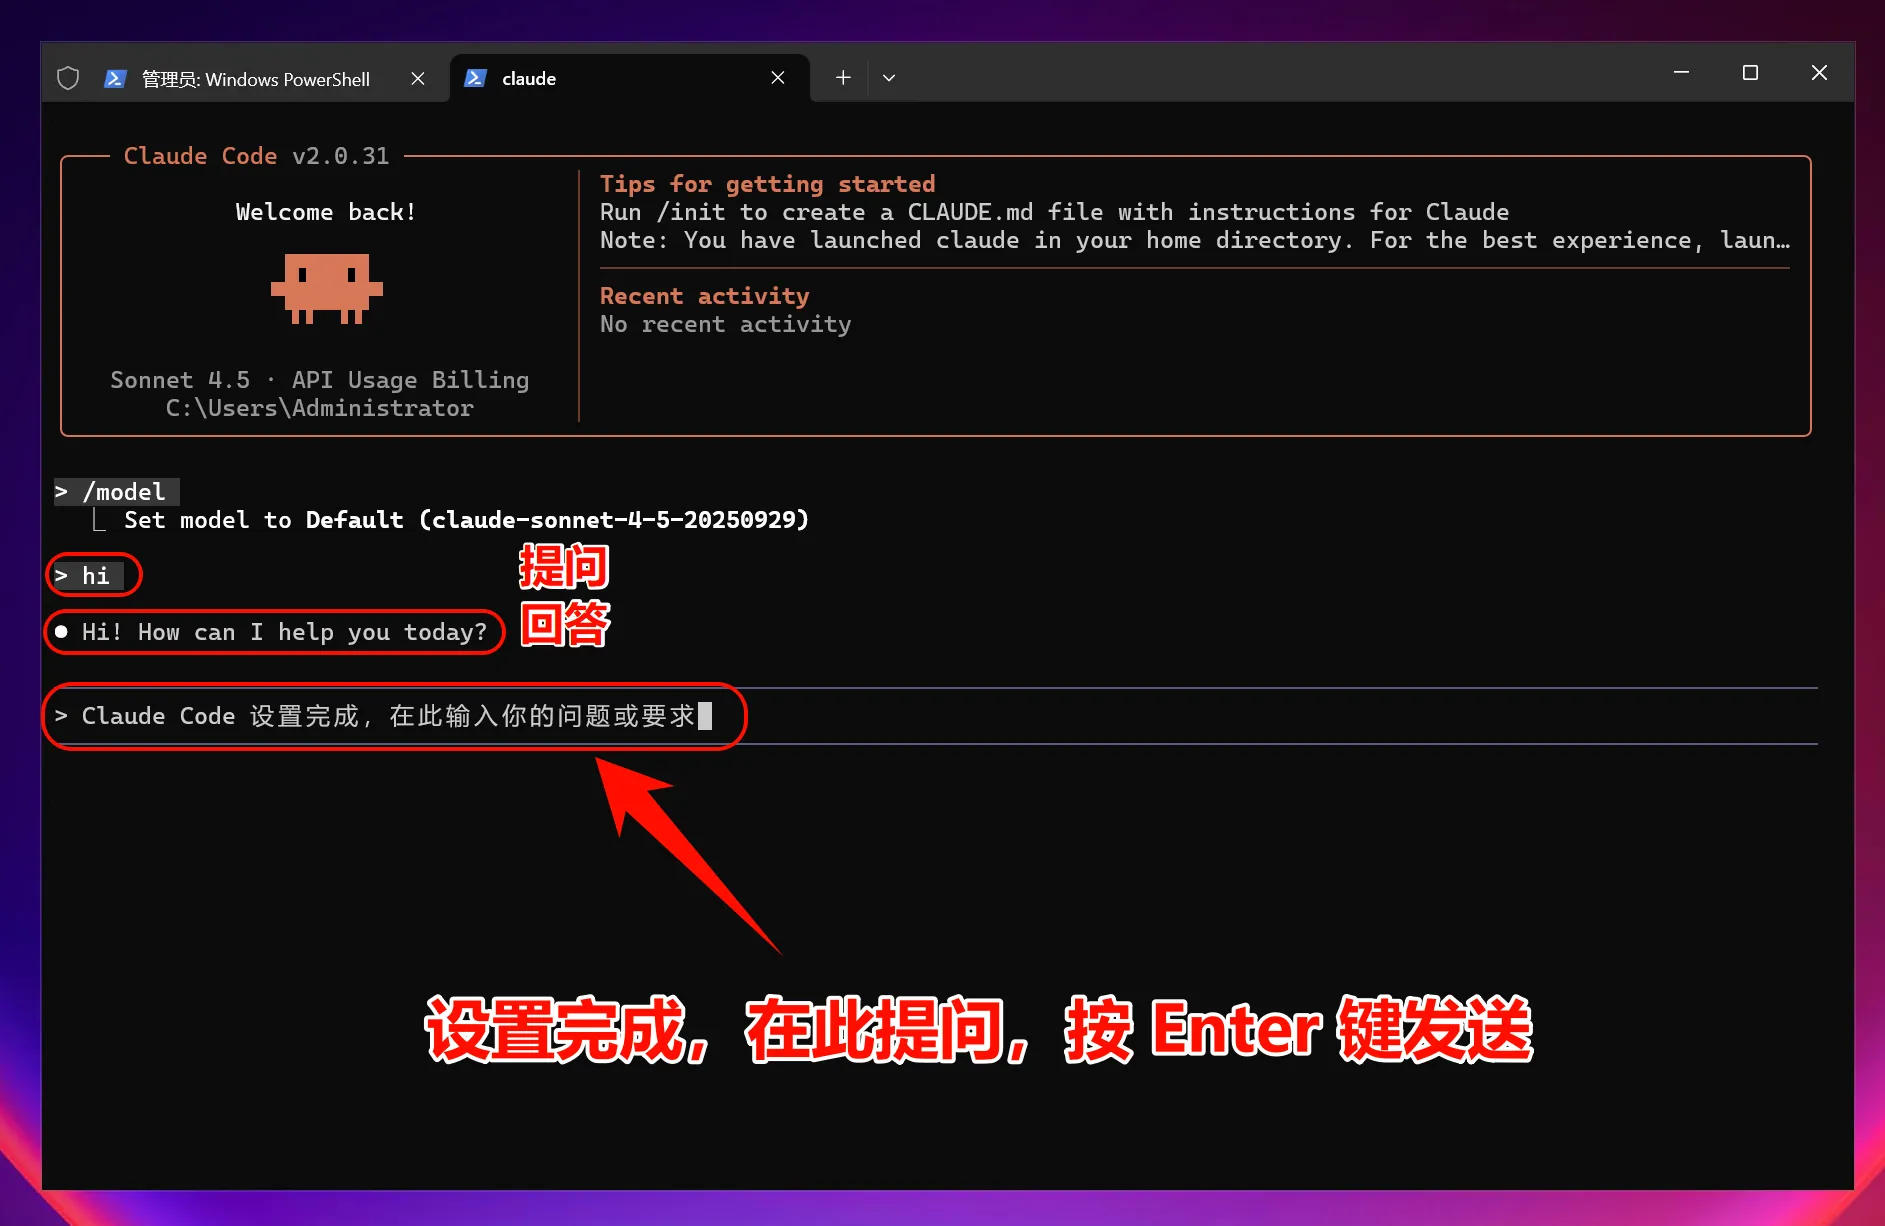
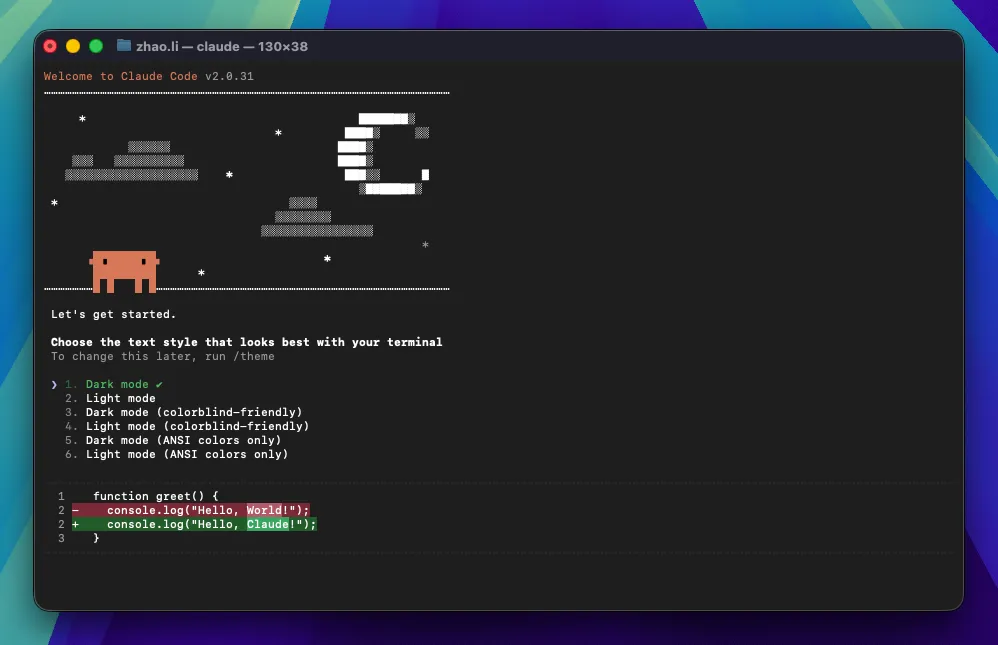
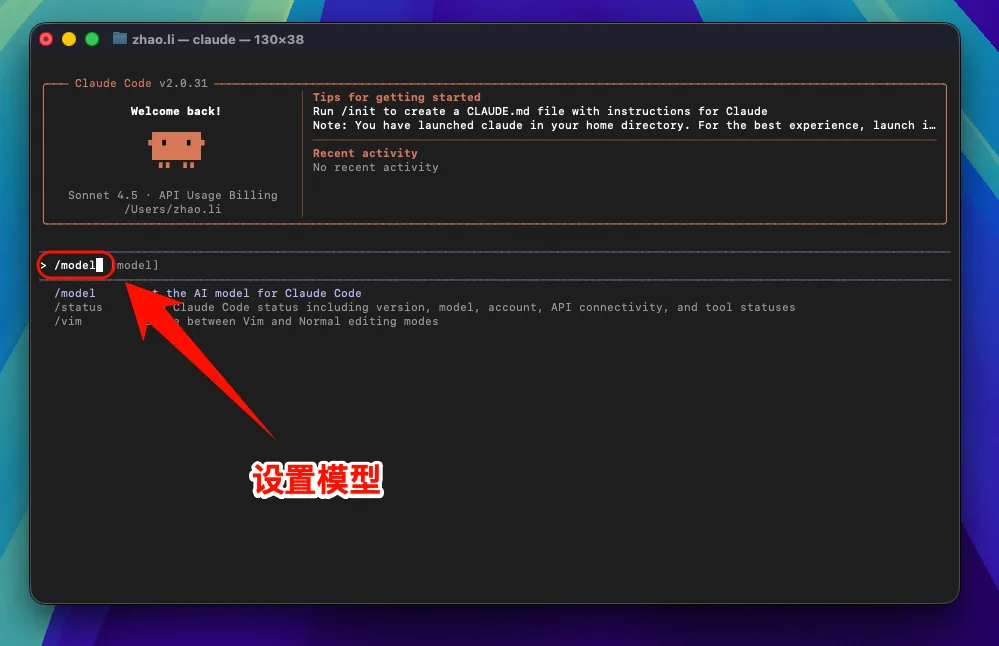
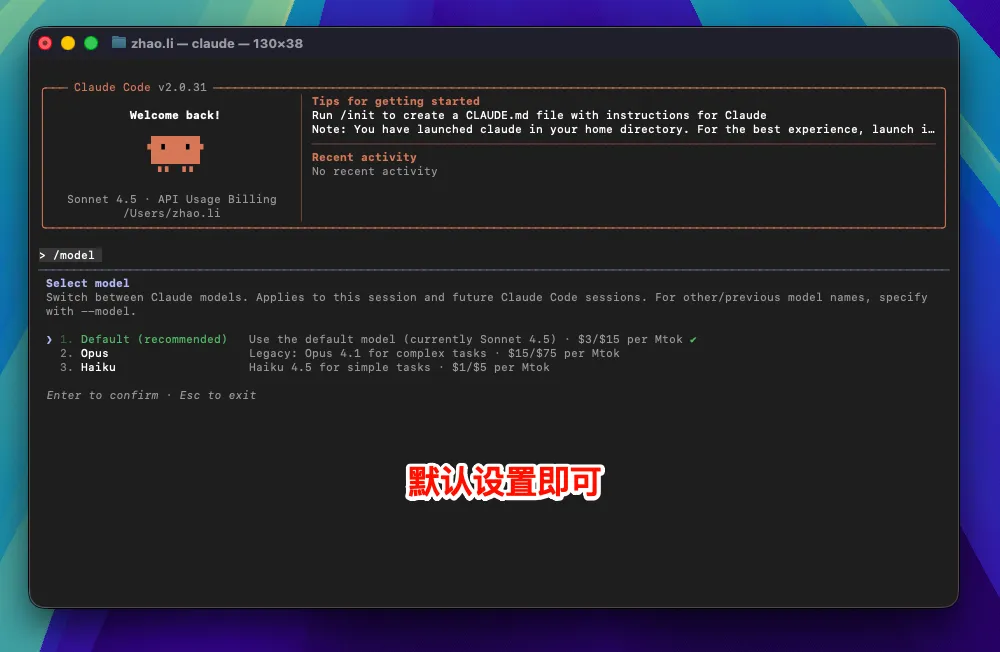
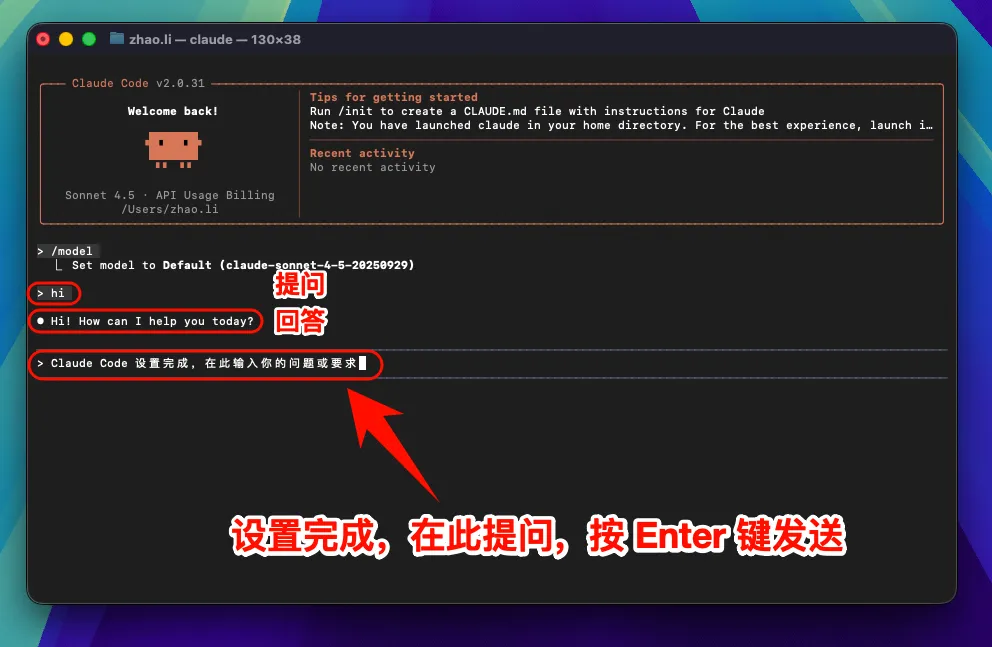
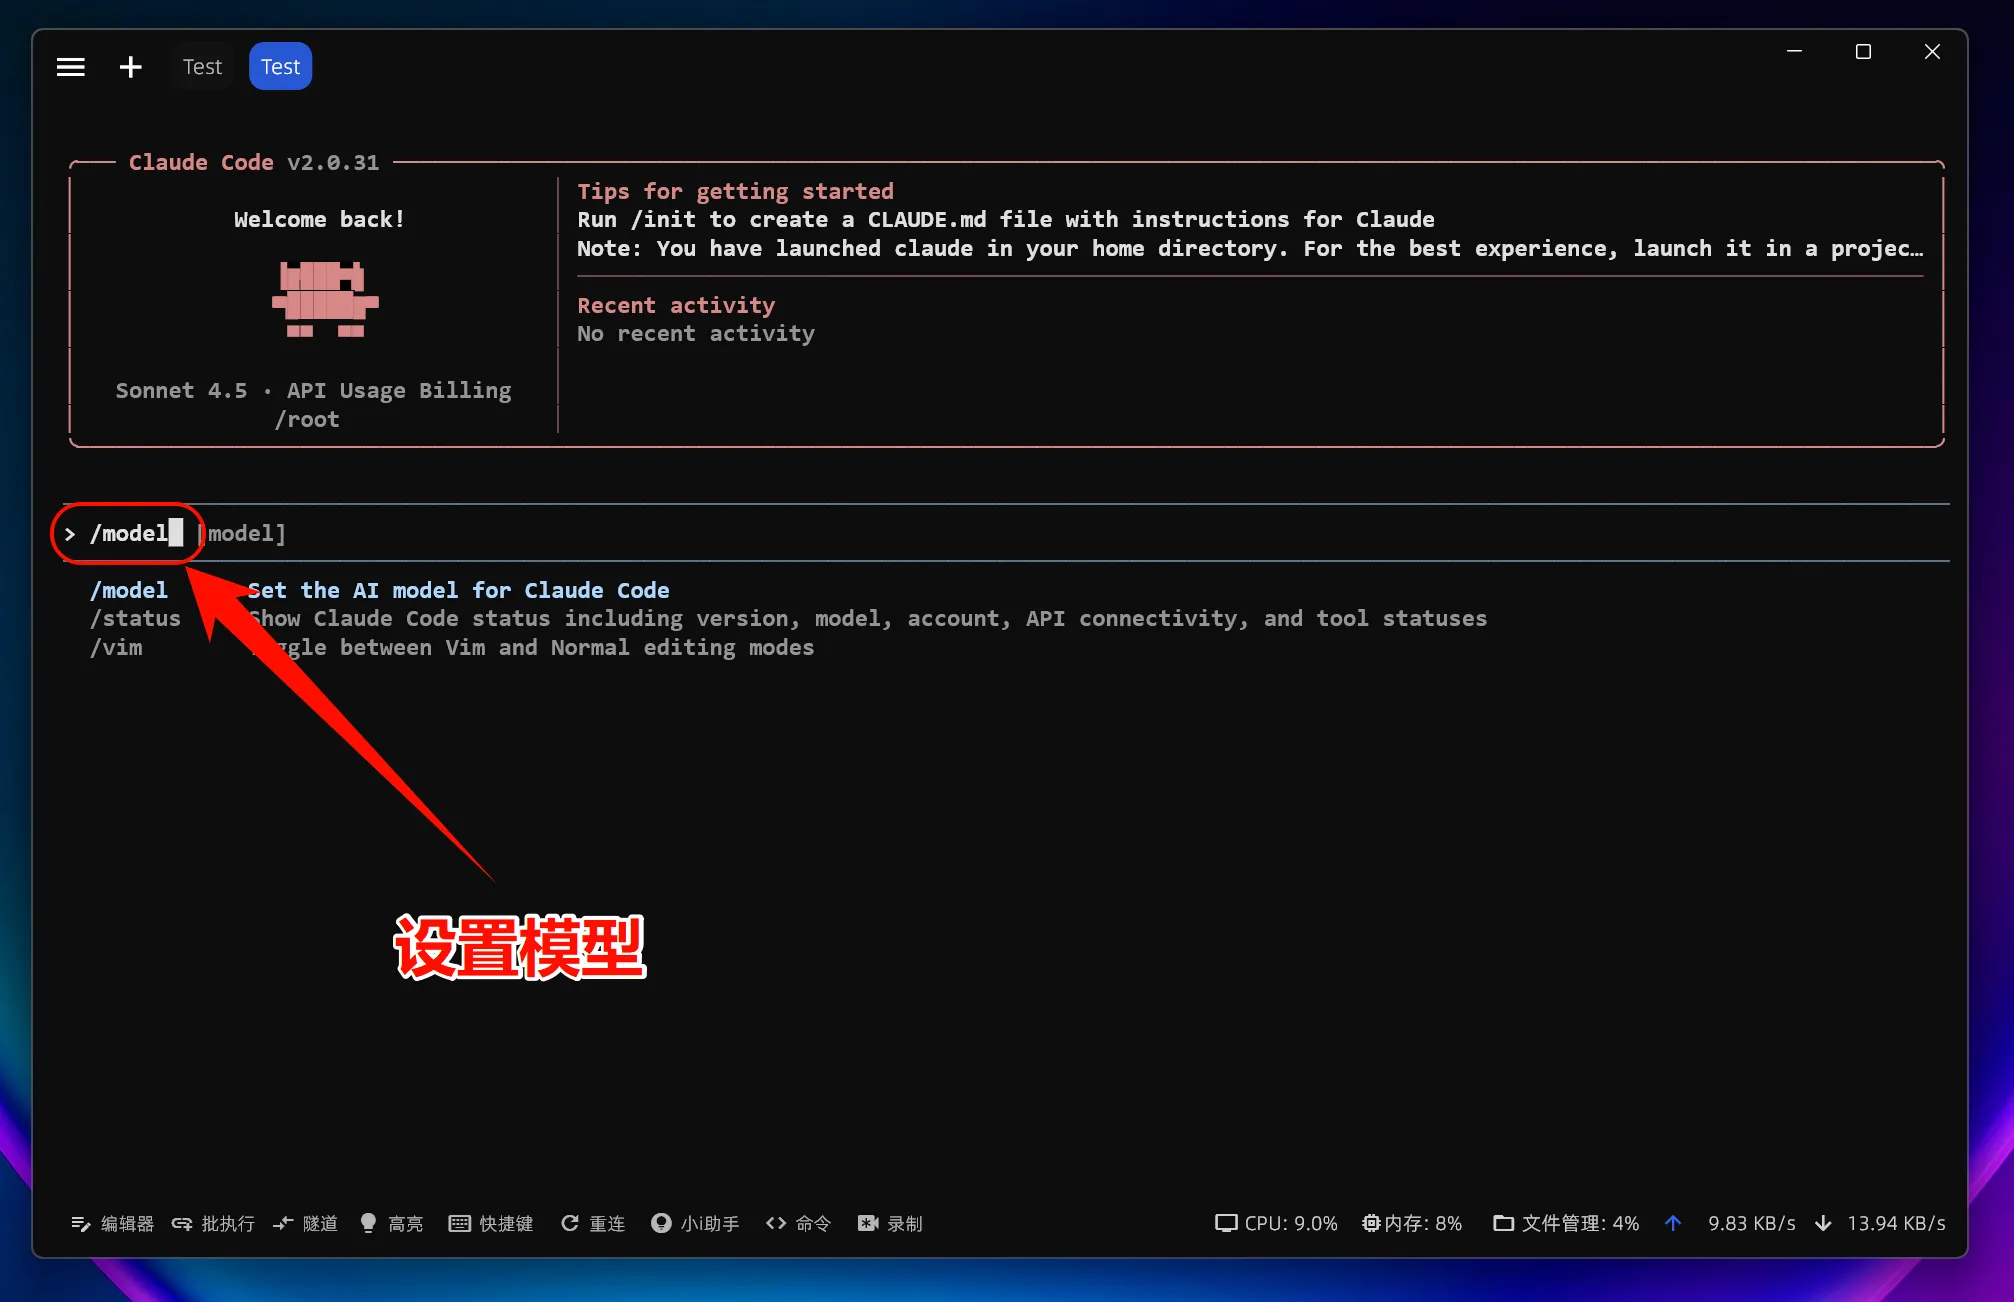
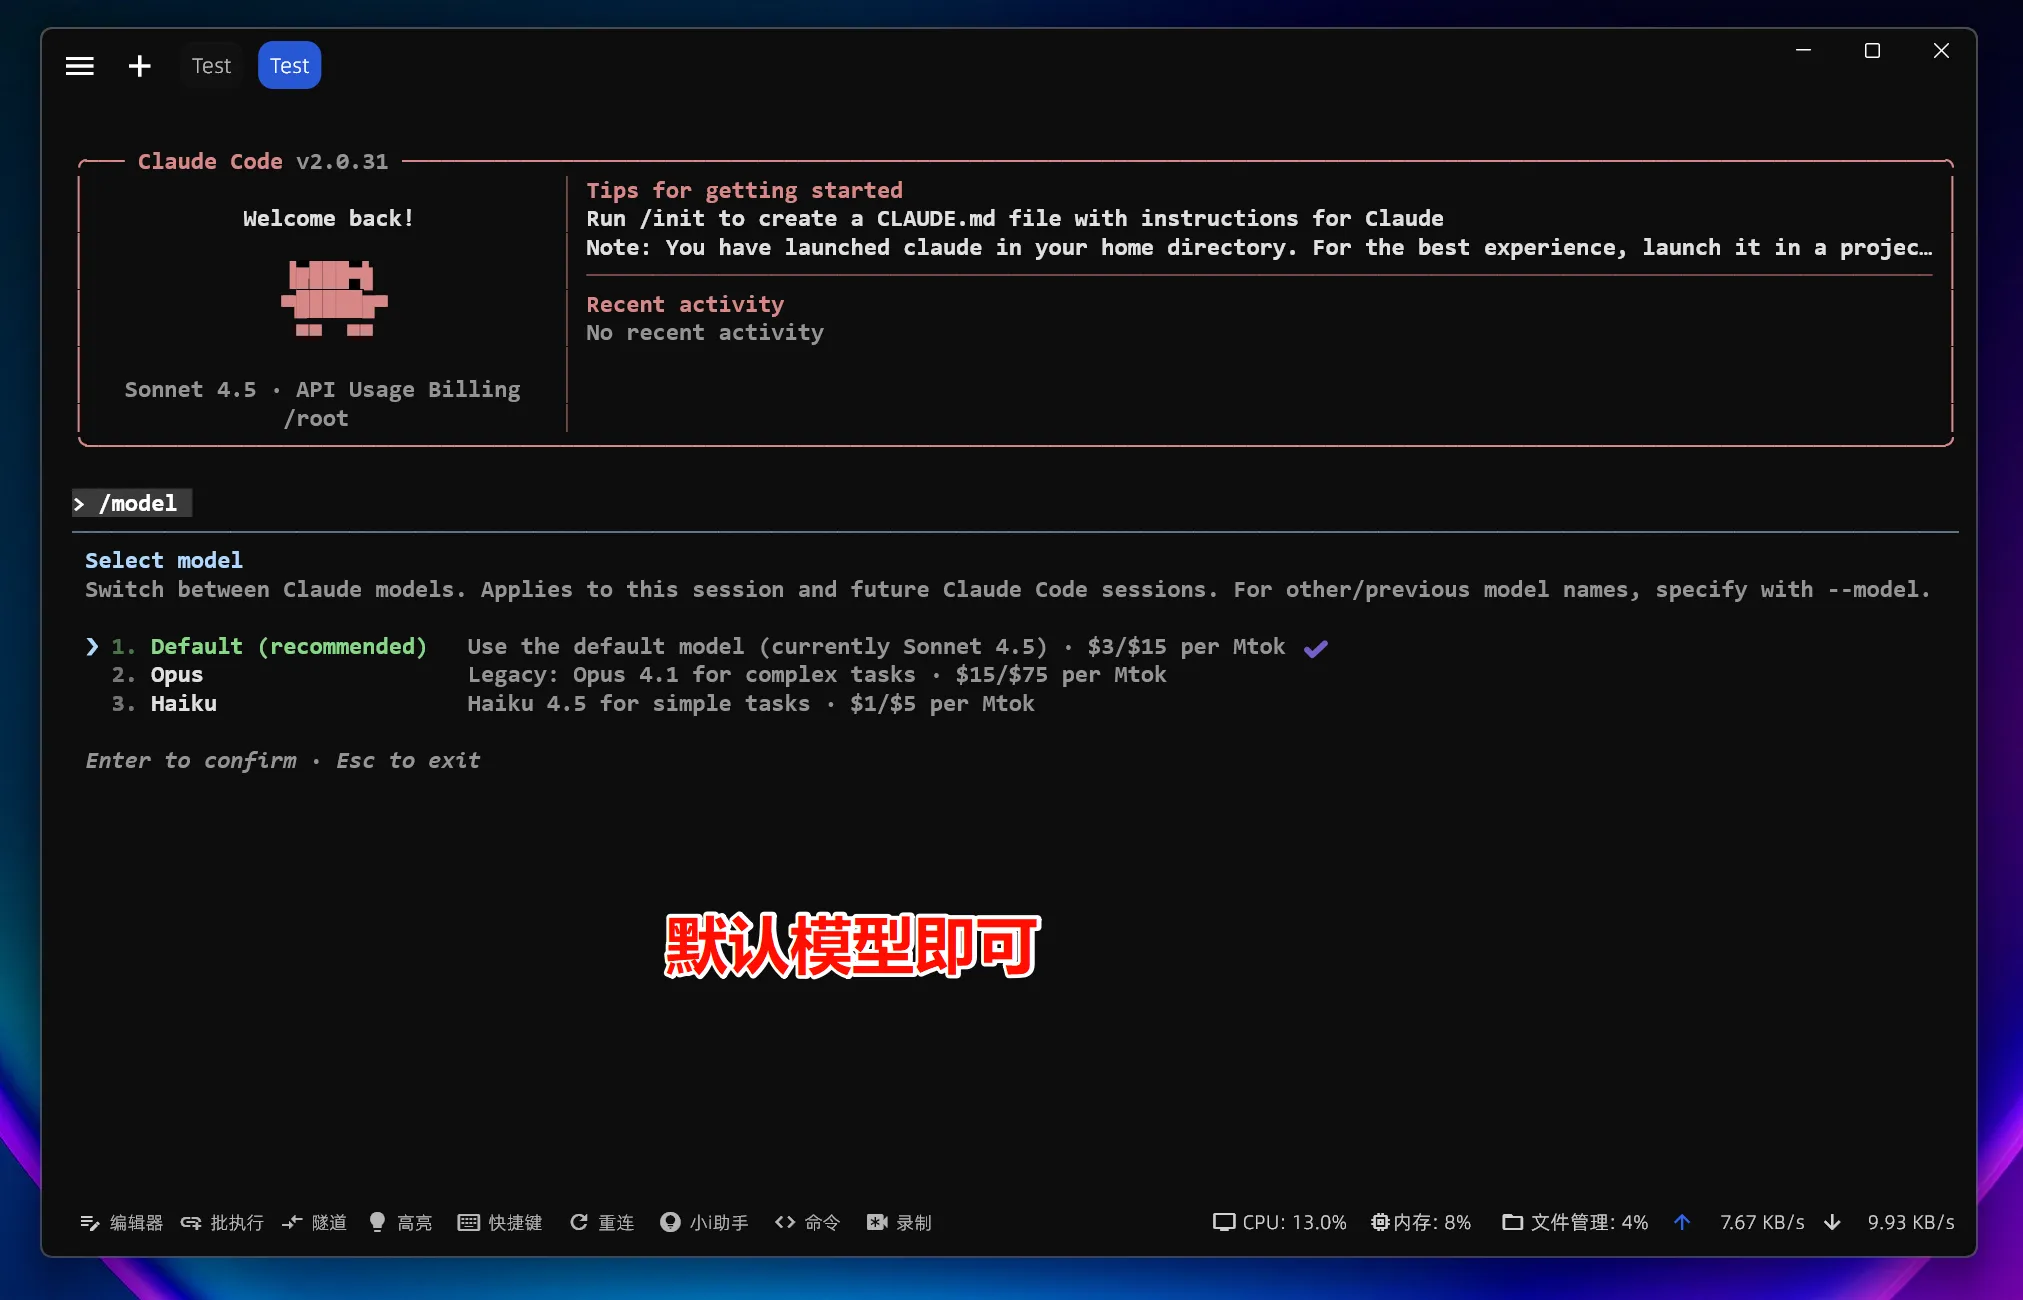
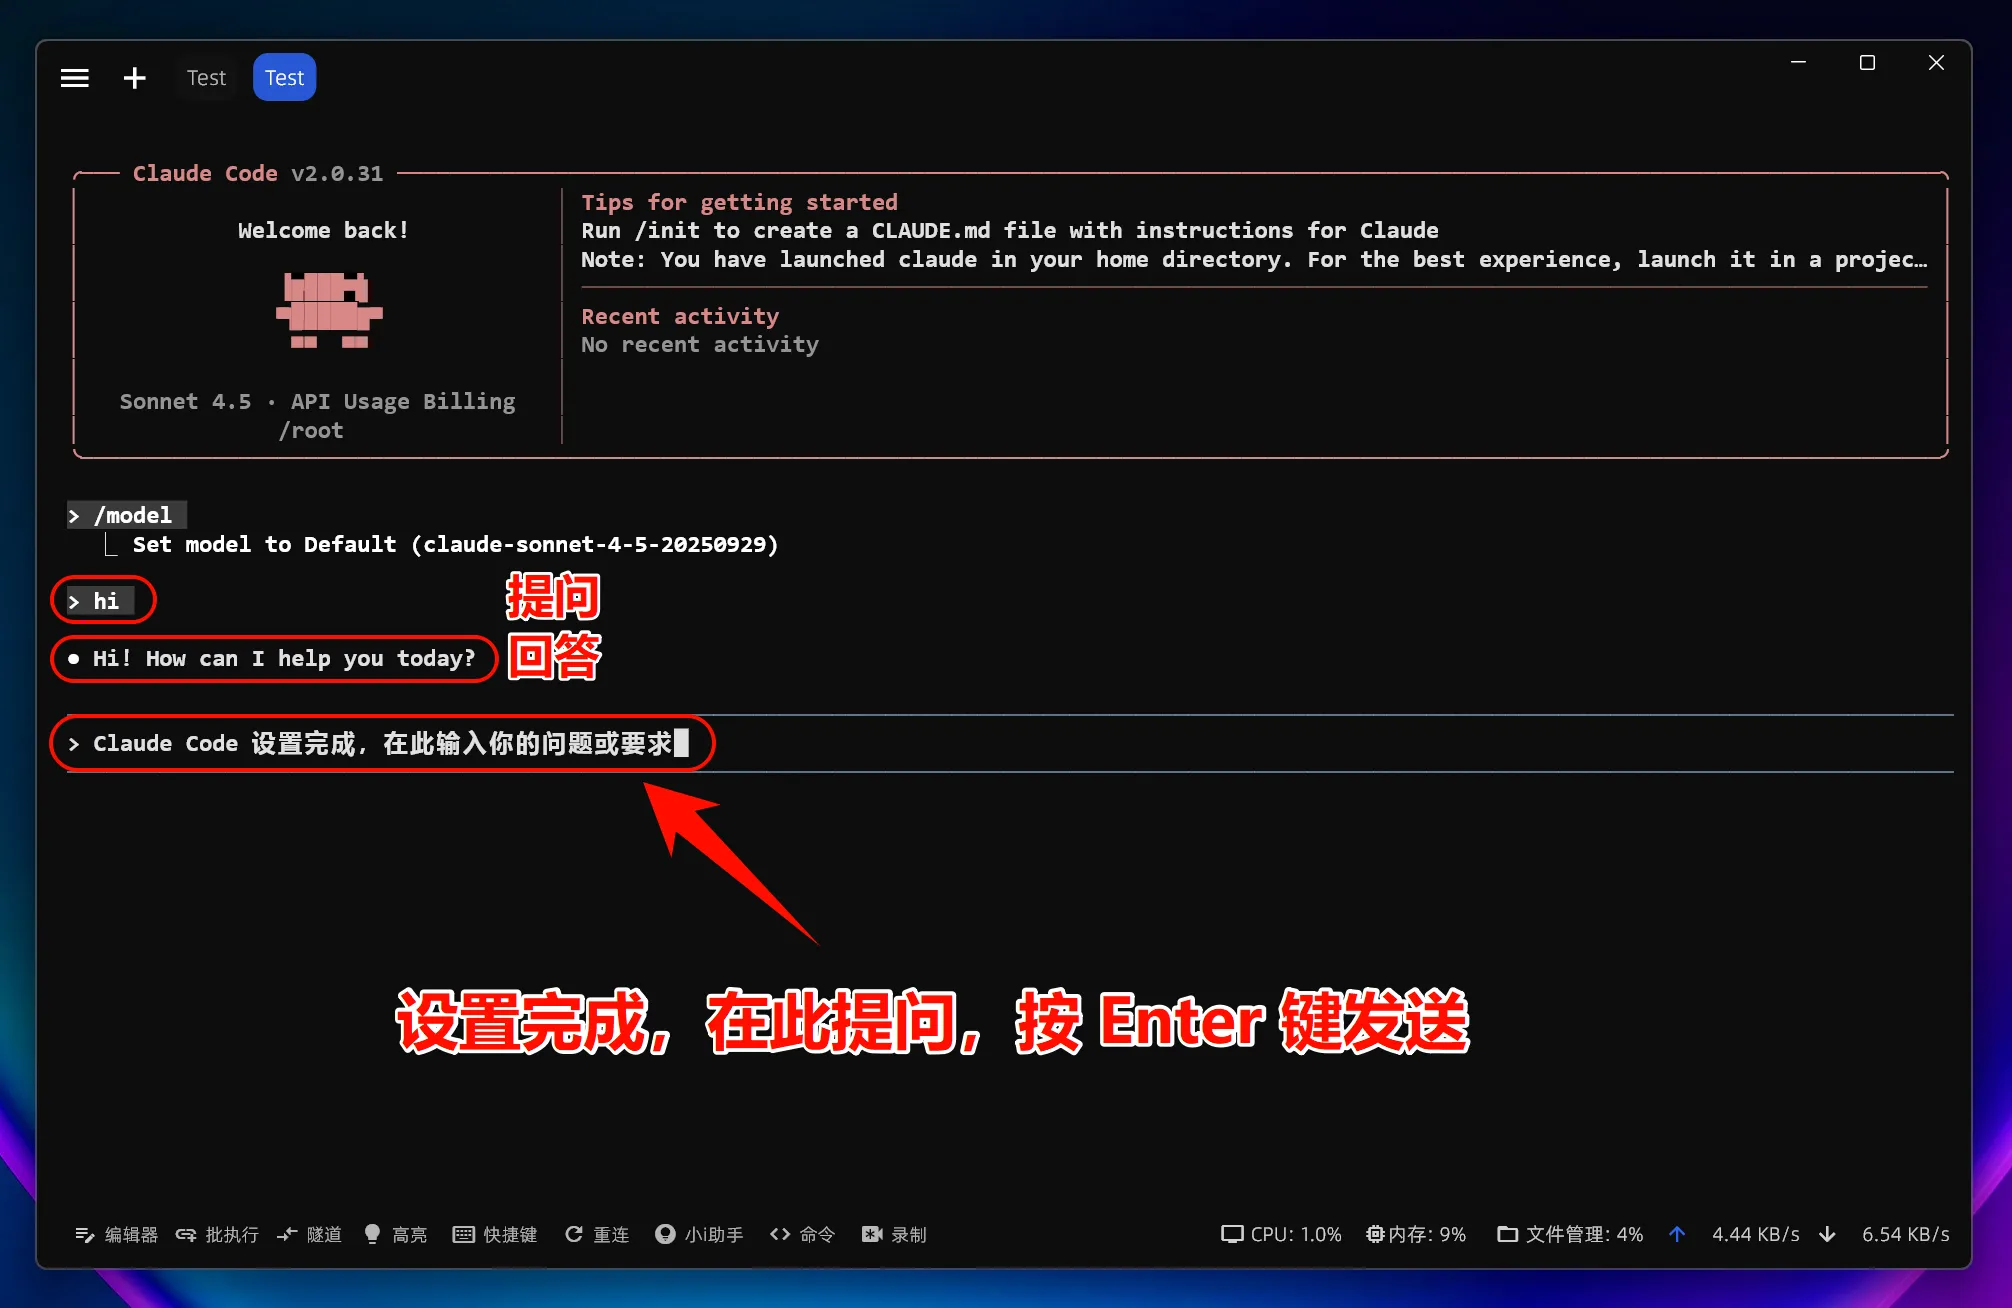
If you want to switch models, enter the following in Claude Code:
/modelThen follow the prompt to select one. In most cases, the default option is sufficient.
Tip: If you also want to switch Claude Code to
Mole API, you can jump directly to the "Connect to MoleAPI" section below without reinstalling.
macOS / Linux Step-by-Step Guide
The installation process is mostly the same on these two platforms: both use the official native installation script in the terminal. The main differences are shell configuration files, system dependencies, and permission policies.
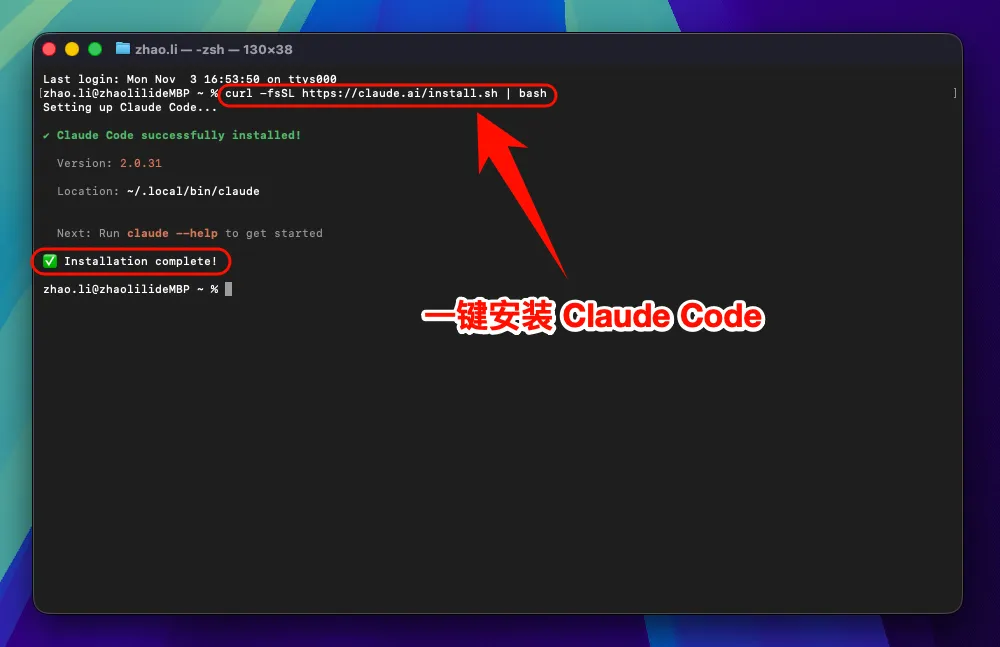
1. Install Claude Code Using the Native Installer Script
Open your terminal and run:
curl -fsSL https://claude.ai/install.sh | bash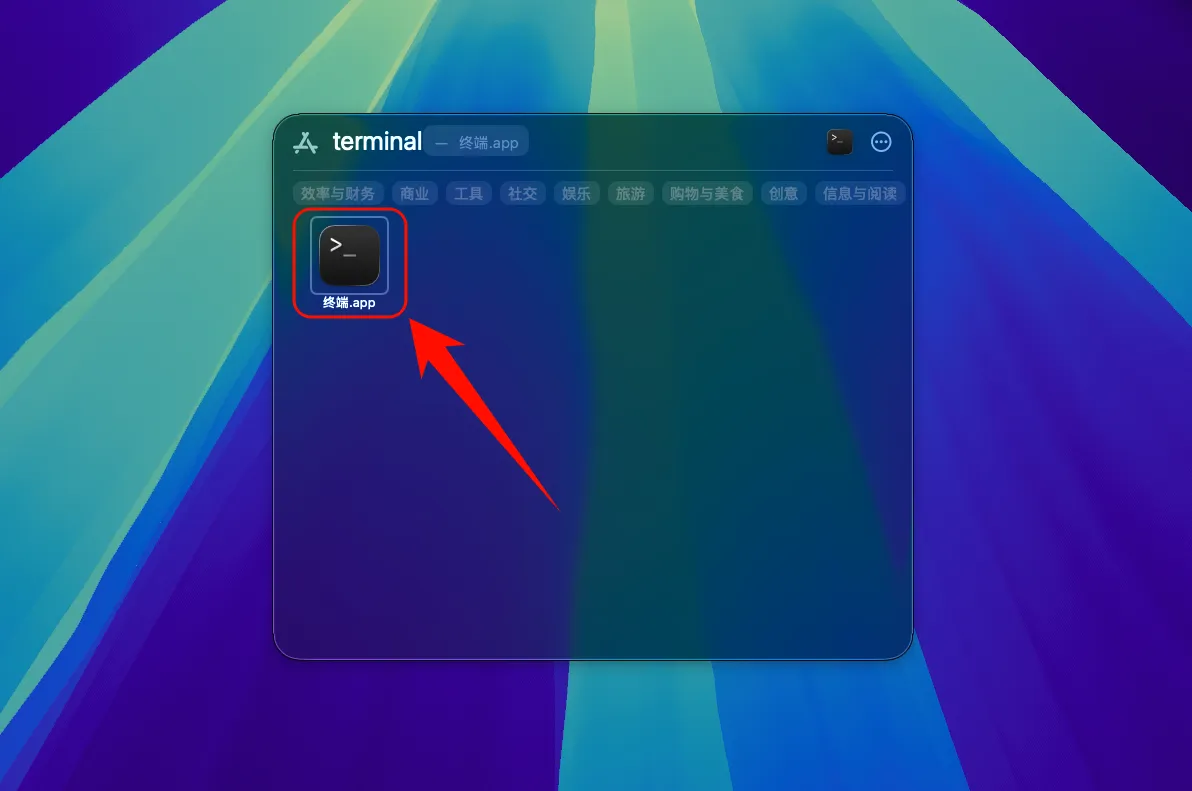
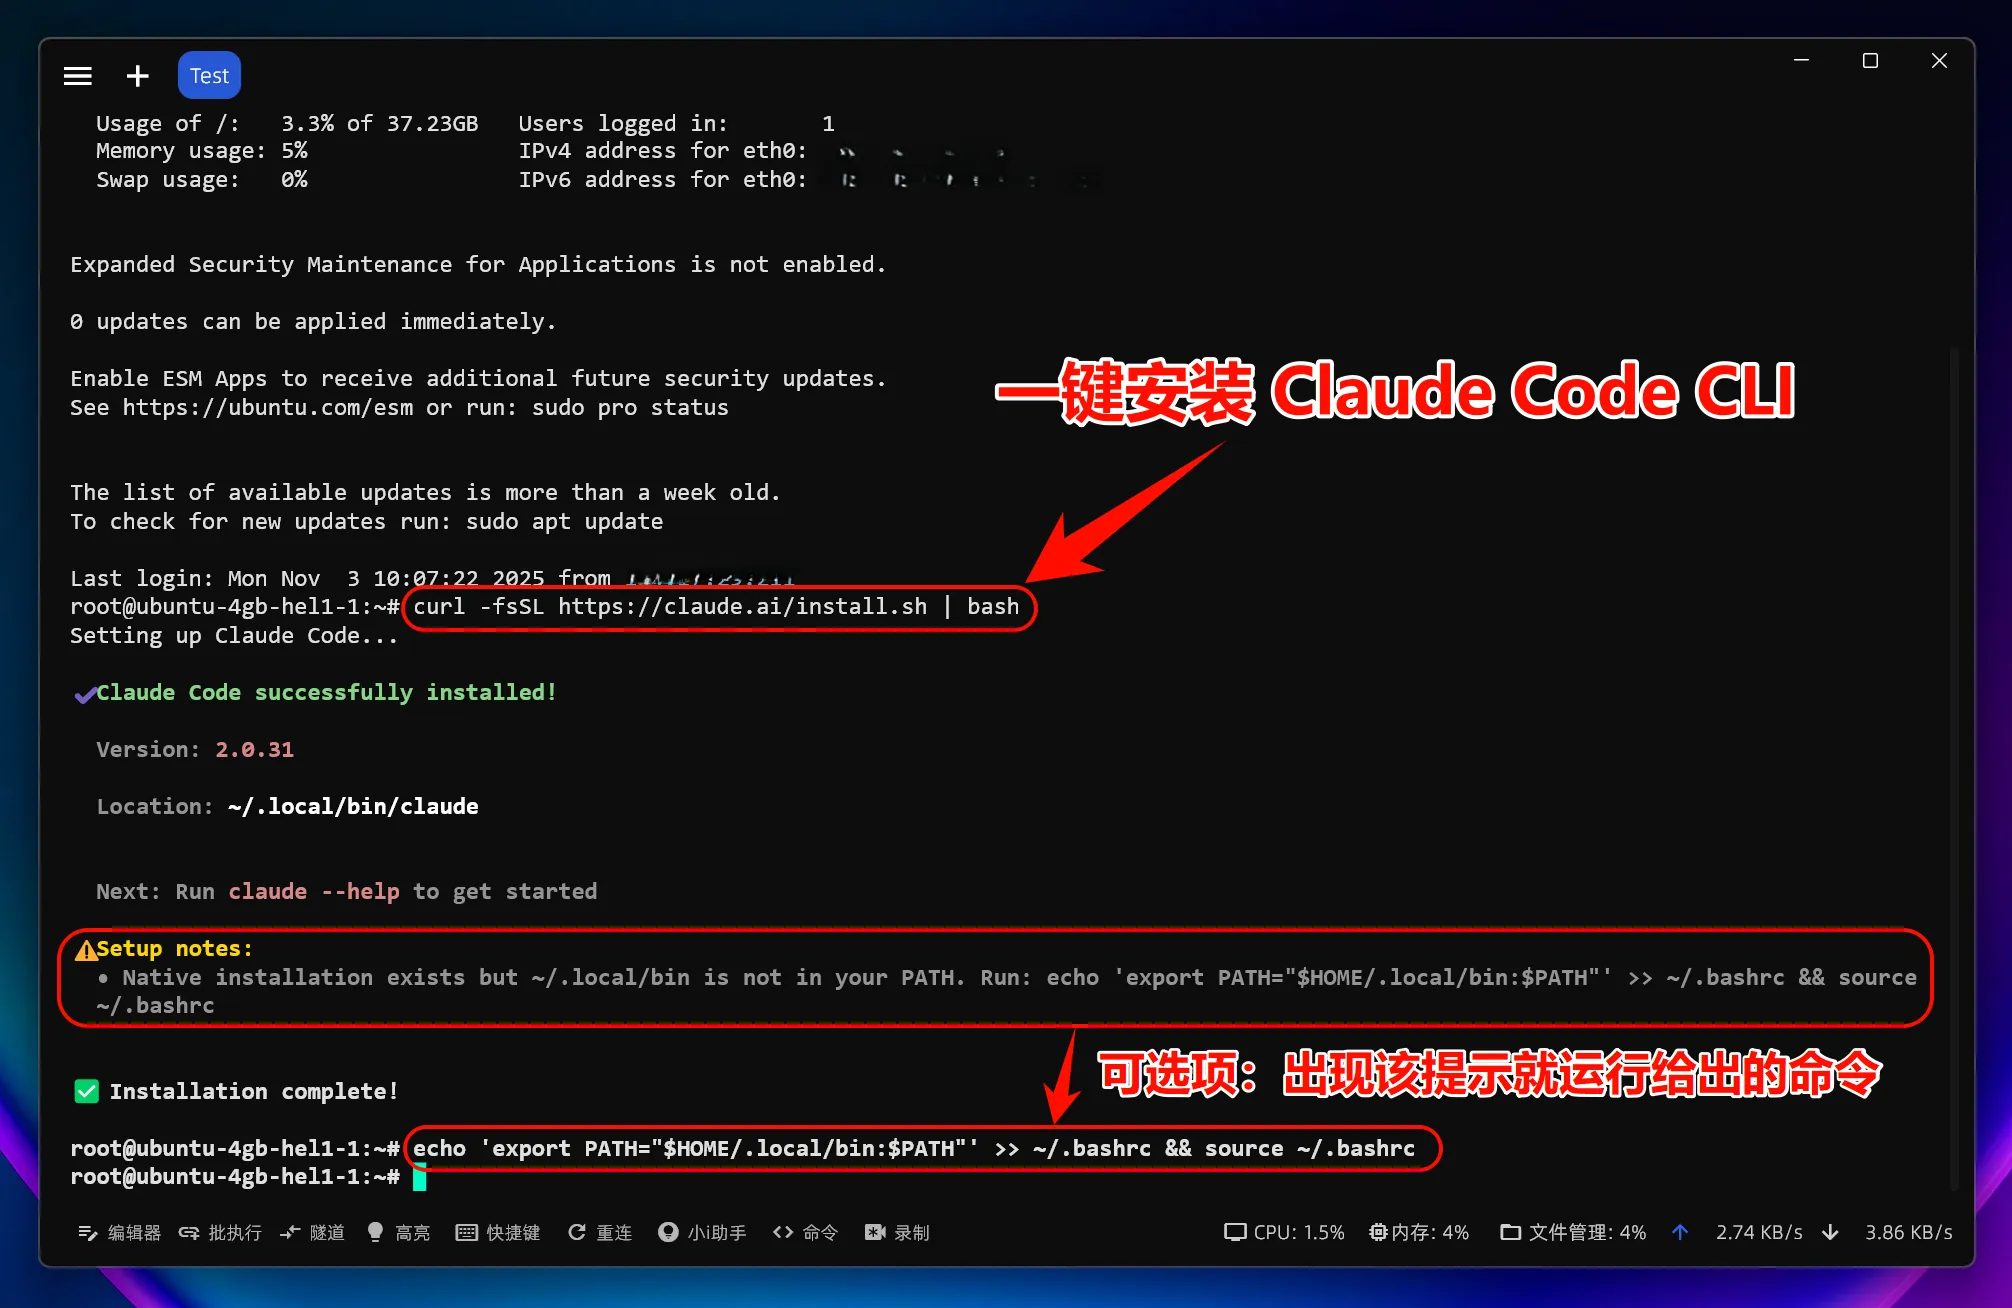
If your terminal prompts you to update PATH, run:
echo 'export PATH="$HOME/.local/bin:$PATH"' >> ~/.bashrc
source ~/.bashrc
If you use zsh, write it to ~/.zshrc instead.
After installation, run:
claude --version
claude doctor
2. Start Using Claude Code
Launch directly:
claudeLaunch from a project directory:
cd /path/to/your/project
claude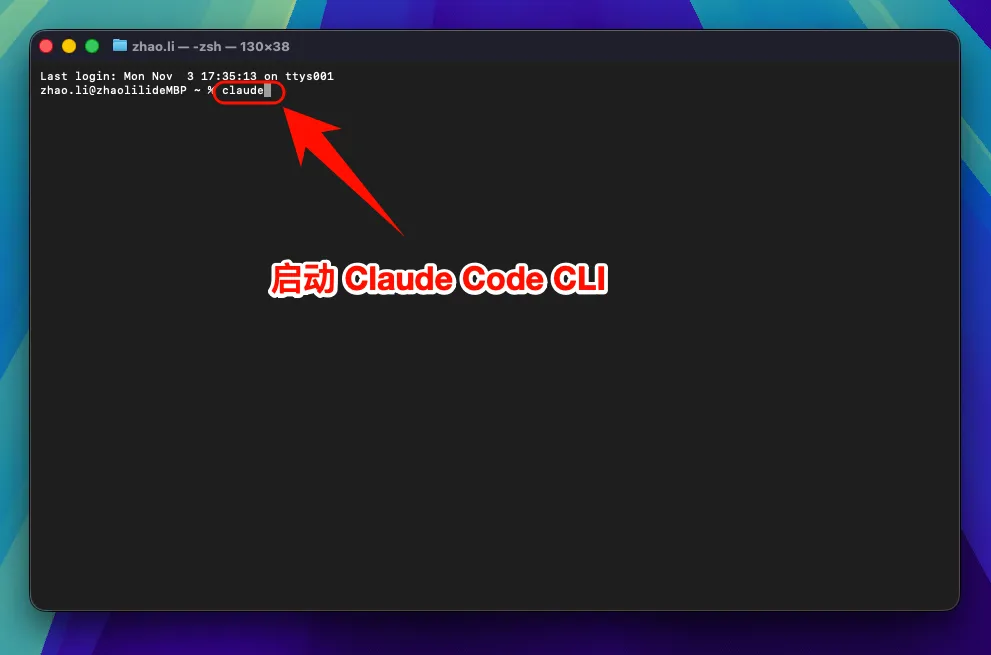
If you want to switch models, enter:
/modelPress Enter and choose a model. In most cases, the default configuration is fine.
Tip: If you have already completed installation, you can continue directly to the "Connect to MoleAPI" section below to migrate to a custom endpoint in one step.
4. Additional Notes for macOS / Linux
If macOS blocks execution, go to the Security & Privacy section in System Settings and allow the app to run. For more complete system compatibility and uninstall instructions, refer directly to the official installation docs.
The official docs also mention that some Linux distributions may require additional dependencies. For example, musl-based systems such as Alpine typically need libgcc, libstdc++, and ripgrep, along with environment variable adjustments as described in the official docs.
If your environment variables are not taking effect, check the following:
- Whether you modified the correct shell configuration file, such as
~/.bashrcor~/.zshrc - Whether you reopened the terminal or ran
source ~/.bashrc - Whether
echo $ANTHROPIC_BASE_URLshows the variable value correctly
If you need more complete information about system requirements, specific version installation, upgrades and uninstallation, or special cases such as Windows / WSL / Alpine, continue reading the official docs: https://code.claude.com/docs/en/setup and https://code.claude.com/docs/en-US/overview.
Connect to MoleAPI
If you have already installed Claude Code, there is no need to reinstall it. Just configure the environment variables manually using the steps below to switch to Mole API.
Tip: Before you start, go to the MoleAPI dashboard and get your API Key. Visit https://home.moleapi.com/ , then after signing in, generate and copy your personal key from the account center or token management page. You will need it when configuring the environment variables below.
Applicable scenarios:
- You have already installed Claude Code using the steps above
- You were previously using the official default configuration and want to switch to
MoleAPI - You previously configured another gateway address and want to migrate quickly to
MoleAPI
Windows: Manually Migrate to Mole API
Run the following in PowerShell. Copy and execute one line at a time; do not paste everything at once:
[Environment]::SetEnvironmentVariable('ANTHROPIC_API_TOKEN', '', 'User')
$env:ANTHROPIC_API_TOKEN = ''

[Environment]::SetEnvironmentVariable('ANTHROPIC_BASE_URL', 'https://api.moleapi.com', 'User')
[Environment]::SetEnvironmentVariable('ANTHROPIC_API_KEY', 'your-moleapi-api-key', 'User')
[Environment]::SetEnvironmentVariable('ANTHROPIC_MODEL', 'claude-sonnet-4-5-20250929', 'User')
[Environment]::SetEnvironmentVariable('ANTHROPIC_SMALL_FAST_MODEL', 'claude-haiku-4-5-20251001', 'User')

$env:ANTHROPIC_BASE_URL = 'https://api.moleapi.com'
$env:ANTHROPIC_API_KEY = 'your-moleapi-api-key'
$env:ANTHROPIC_MODEL = 'claude-sonnet-4-5-20250929'
$env:ANTHROPIC_SMALL_FAST_MODEL = 'claude-haiku-4-5-20251001'
Configuration item descriptions:
ANTHROPIC_API_TOKEN: Legacy token used by the official login session. If you previously configured an official token, it is recommended to clear it first to avoid mixing it with third-party configuration.ANTHROPIC_BASE_URL: The API address used by Claude Code requests. Set it here to theMole APIendpoint.ANTHROPIC_API_KEY: Your ownMole API Key. Replaceyour-moleapi-api-keyin the example with your actual key.ANTHROPIC_MODEL: Primary model configuration, typically used for most standard generations and complex tasks.ANTHROPIC_SMALL_FAST_MODEL: Lightweight fast model configuration, typically used for faster and lower-cost auxiliary calls.
The first half above writes user-level environment variables, so they remain effective after reopening the terminal. The second half using $env: makes them take effect immediately in the current PowerShell session.
After the migration is complete, reopen a terminal window and run:
claudeThen use /model as needed to verify that the model list has switched to your configured endpoint.
macOS / Linux / Git Bash: Manually Migrate to Mole API
A complete example is provided below. Copy and paste it based on the terminal you use:
export ANTHROPIC_API_TOKEN=""
export ANTHROPIC_BASE_URL="https://api.moleapi.com"
export ANTHROPIC_API_KEY="your-moleapi-api-key"
export ANTHROPIC_MODEL="claude-sonnet-4-5-20250929"
export ANTHROPIC_SMALL_FAST_MODEL="claude-haiku-4-5-20251001"
If you only want it to take effect for the current terminal session, just run the commands above directly in your terminal.
If you want it to take effect long-term/persistently, copy the matching commands below based on your terminal:
For Bash users, append to ~/.bashrc:
cat <<'EOF' >> ~/.bashrc
export ANTHROPIC_API_TOKEN=""
export ANTHROPIC_BASE_URL="https://api.moleapi.com"
export ANTHROPIC_API_KEY="your-moleapi-api-key"
export ANTHROPIC_MODEL="claude-sonnet-4-5-20250929"
export ANTHROPIC_SMALL_FAST_MODEL="claude-haiku-4-5-20251001"
EOF
source ~/.bashrc
For Zsh users, append to ~/.zshrc:
cat <<'EOF' >> ~/.zshrc
export ANTHROPIC_API_TOKEN=""
export ANTHROPIC_BASE_URL="https://api.moleapi.com"
export ANTHROPIC_API_KEY="your-moleapi-api-key"
export ANTHROPIC_MODEL="claude-sonnet-4-5-20250929"
export ANTHROPIC_SMALL_FAST_MODEL="claude-haiku-4-5-20251001"
EOF
source ~/.zshrc
For Git Bash users, you can usually append to ~/.bashrc:
cat <<'EOF' >> ~/.bashrc
export ANTHROPIC_API_TOKEN=""
export ANTHROPIC_BASE_URL="https://api.moleapi.com"
export ANTHROPIC_API_KEY="your-moleapi-api-key"
export ANTHROPIC_MODEL="claude-sonnet-4-5-20250929"
export ANTHROPIC_SMALL_FAST_MODEL="claude-haiku-4-5-20251001"
EOF
source ~/.bashrc
If your Git Bash environment prefers reading ~/.bash_profile, you can append to that file instead.
For Fish users, append to ~/.config/fish/config.fish:
mkdir -p ~/.config/fish
cat <<'EOF' >> ~/.config/fish/config.fish
set -x ANTHROPIC_API_TOKEN ""
set -x ANTHROPIC_BASE_URL "https://api.moleapi.com"
set -x ANTHROPIC_API_KEY "your-moleapi-api-key"
set -x ANTHROPIC_MODEL "claude-sonnet-4-5-20250929"
set -x ANTHROPIC_SMALL_FAST_MODEL "claude-haiku-4-5-20251001"
EOF
source ~/.config/fish/config.fish
If you are not sure which shell you are currently using, run echo $SHELL first and then choose the appropriate commands.
Configuration item descriptions:
ANTHROPIC_API_TOKEN: If you previously configured an official token, clear it first to avoid conflicts with the new third-party configuration.ANTHROPIC_BASE_URL: Request address. Set it to theMole APIendpoint.ANTHROPIC_API_KEY: Your ownMole API Key.ANTHROPIC_MODEL: Primary model configuration.ANTHROPIC_SMALL_FAST_MODEL: Lightweight fast model configuration.
After the migration is complete, run the following command to start Claude Code:
claudeIf needed, you can use echo $ANTHROPIC_BASE_URL to verify that the environment variable has been written to your current shell configuration.
Note: After migration, model requests in Claude Code will use your configured
Mole APIendpoint by default instead of the official default quota.
How is this guide?
Last updated on
How to Use Mainstream CLI Tools
How to use MoleAPI in mainstream command-line tools or plugins such as Claude Code, Cursor, and Gemini.
Claude Code Extension in VS Code
Install the Claude Code extension in VS Code and connect it to Mole API. Starting with Claude Code 2.0, third-party APIs are officially blocked. This tutorial is the first of its kind online.